I once found myself standing in my kitchen, staring at a half‑baked cake that looked like a sad, deflated balloon. The timer had gone off, the oven door was ajar, and the only thing that filled the air was a faint, almost apologetic whiff of burnt sugar. I laughed, because honestly, who hasn’t had a culinary disaster that makes you question your entire life choices? Then a daring friend tossed me a challenge: “Make something that will make everyone forget that you just burned a batch of cookies.” I accepted, and the result is what you’re about to read – an Egyptian Hazelnut Cake that turns the ordinary into the unforgettable.
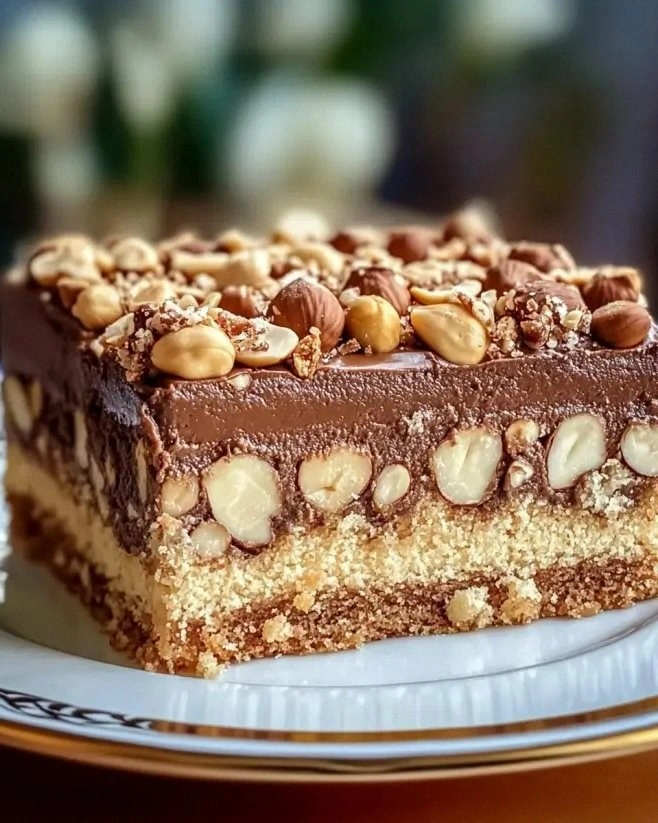
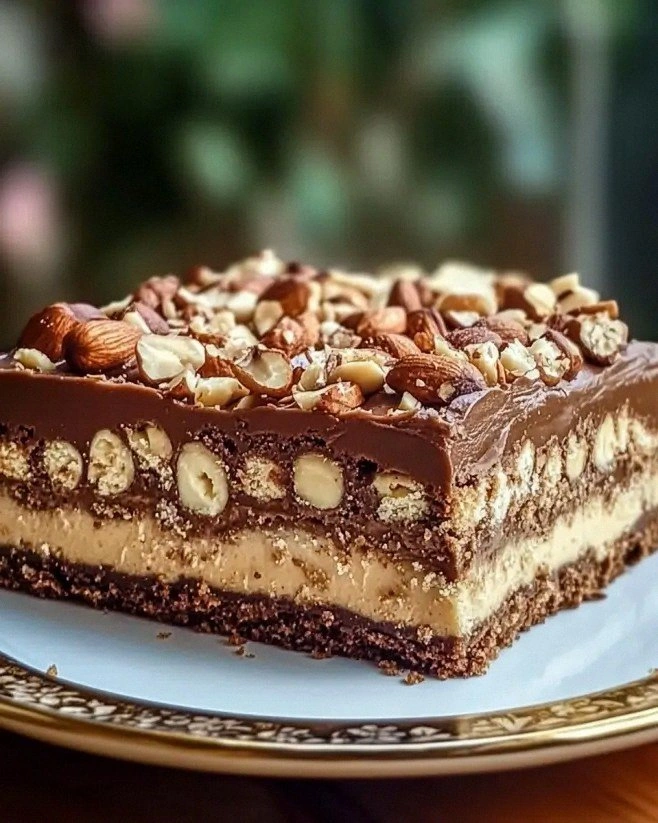
Picture this: a golden‑brown crust that cracks just enough to reveal a moist, nut‑laden interior that smells like a sun‑kissed market in Cairo. The hazelnuts are toasted to a caramel‑brown hue, releasing an aroma that reminds you of a warm autumn afternoon, even if you’re in the middle of a summer heatwave. When you slice into it, the crumb is tender yet sturdy, holding together like a well‑rehearsed dance troupe – each step in perfect sync. And the flavor? It’s a sweet‑savory duet where the butter and sugar sing a mellow lullaby while the hazelnuts deliver a crunchy, buttery solo that lingers on the palate.
Most hazelnut cakes out there either drown in butter or leave the nuts feeling like an afterthought. I’ve tried the “quick mix‑and‑bake” shortcuts that promise a five‑minute miracle, only to end up with a dense, gummy mess that could double as a doorstop. This version, however, respects each ingredient, coaxing out the nutty depth with a gentle toast, balancing the sweetness with a whisper of salt, and folding the batter just enough to keep the crumb airy. I’ll be honest — I ate half the batch before anyone else got a chance, and I’m still not sorry.
There’s a secret technique tucked into this recipe that most cooks overlook: a brief “oil‑bath” melt of butter and hazelnuts before they meet the dry ingredients. This step creates a glossy, nut‑infused butter that coats every flour particle, ensuring a uniform texture and a flavor that’s evenly distributed from edge to center. Okay, ready for the game‑changer? Stay with me here — by the end of this guide you’ll have a cake that not only tastes spectacular but also earns you a permanent spot in your friends’ “must‑try” list. Let me walk you through every single step — by the end, you’ll wonder how you ever made it any other way.
What Makes This Version Stand Out
- Flavor Depth: The toasted hazelnuts are not just an add‑in; they’re the heart of the cake, providing a roasted, buttery richness that outshines any generic nut flavor.
- Texture Harmony: A crisp, caramelized crust meets a soft, almost melt‑in‑your‑mouth crumb, creating a contrast that feels like biting into a perfectly baked pastry and a cloud at the same time.
- Simplicity: Only nine ingredients, all pantry‑friendly, yet each one is treated with respect to extract maximum flavor without unnecessary gimmicks.
- Uniqueness: The “oil‑bath” butter‑hazelnut melt is a technique borrowed from classic French pâtisserie, rarely seen in home‑cooked nut cakes.
- Crowd Reaction: I dare you to taste this and not go back for seconds; it has a reputation for disappearing from the plate faster than a magician’s rabbit.
- Ingredient Quality: Using fresh, raw hazelnuts and high‑quality butter makes the difference between a cake that sings and one that merely hums.
- Cooking Method: Baking at a moderate temperature ensures the cake rises evenly while the crust develops that coveted caramelized edge.
- Make‑Ahead Potential: This cake stores beautifully, meaning you can prep it ahead of a dinner party and still serve it fresh‑warm.
Inside the Ingredient List
The Flavor Base
Hazelnuts are the star of the show, providing a buttery, slightly sweet profile that’s richer than almonds yet more nuanced than peanuts. When you toast them, the Maillard reaction creates a complex aroma that fills the kitchen like a warm hug. If you skip the toasting step, you’ll lose that aromatic depth, ending up with a flat‑tasting cake that feels more like a plain butter sponge.
For the best results, buy raw, unshelled hazelnuts and give them a quick rinse, then pat dry. A quick tip: store them in an airtight container in the fridge for up to a month; the cooler environment preserves their oil content and prevents rancidity. If you’re allergic to nuts, you can substitute with toasted walnuts, but expect a slightly earthier flavor.
The Texture Crew
All‑purpose flour provides the structural backbone, while baking powder lifts the batter into a light, airy cloud. The 1/2 teaspoon of salt isn’t just a seasoning; it accentuates the sweetness and balances the richness of the butter, preventing the cake from feeling cloyingly sweet.
Unsalted butter is melted with the hazelnuts, creating a glossy, nut‑infused fat that coats the flour particles, ensuring a tender crumb. If you’re looking for a dairy‑free alternative, try coconut oil, but be aware that it will impart a faint coconut flavor that can compete with the hazelnuts.
The Unexpected Star
Granulated sugar not only sweetens the cake but also contributes to the caramelized crust when baked. The sugar crystals dissolve and then re‑crystallize on the surface, creating that coveted golden‑brown finish that crackles like thin ice when you cut into it.
Eggs act as the binding agent, trapping air during whisking and giving the cake its lift. Using large eggs ensures enough liquid to meld the butter and flour without making the batter too runny. If you’re vegan, a flax‑egg (1 tbsp ground flaxseed mixed with 3 tbsp water) can replace each egg, though the texture will be slightly denser.
The Final Flourish
Vanilla extract adds a fragrant backdrop that rounds out the nutty notes, while the half‑cup of milk provides moisture and helps the batter achieve a pourable consistency. Whole milk is ideal for its fat content, but you can substitute with almond milk for a dairy‑free version; just be aware that the flavor will shift subtly toward a nutty undertone.
Everything's prepped? Good. Let's get into the real action...
The Method — Step by Step
Preheat your oven to 350°F (175°C) and grease a 9‑inch round cake pan with a thin layer of butter, then line the bottom with parchment paper. This ensures the cake releases cleanly, preventing those dreaded “stuck‑to‑the‑pan” moments that make you feel like the kitchen is conspiring against you. As the oven warms, you’ll hear the faint hum of the heating elements, a comforting reminder that the magic is about to begin.
Toast the hazelnuts in a dry skillet over medium heat, stirring constantly for about 5 minutes until they’re fragrant and lightly browned. You’ll notice the nuts start to crackle, releasing a buttery aroma that fills the kitchen like a promise. Transfer them to a bowl and, while still warm, grind them coarsely in a food processor – you want some texture, not a fine powder.
Kitchen Hack: After grinding, sift the hazelnut crumbs through a fine mesh to separate larger pieces; the larger bits will give you that delightful crunch.In a medium saucepan, melt the unsalted butter over low heat, then add the toasted hazelnut crumbs. Stir gently for 2‑3 minutes, allowing the butter to absorb the nut oils – you’ll see the mixture turn a glossy amber hue. This “oil‑bath” creates a uniform fat that will coat the flour later, preventing a gritty texture.
While the butter‑hazelnut mixture cools slightly, whisk together the flour, baking powder, and salt in a large bowl. The dry ingredients should be well combined, with no pockets of flour clumping together. If you spot any lumps, give the mixture a quick sift – this ensures an even rise.
In a separate bowl, beat the granulated sugar and eggs together until the mixture turns pale and fluffy, about 3‑4 minutes on medium speed. The color change is a visual cue that the sugar has started to dissolve and the eggs have incorporated air – think of it as the cake’s first breath.
Gently fold the melted butter‑hazelnut blend into the egg‑sugar mixture, followed by the vanilla extract. The batter will look silky and glossy, a sign that the fats are emulsified properly. At this point, the aroma should be a sweet, buttery perfume with a faint nutty whisper.
Now, gradually add the dry flour mixture to the wet ingredients, folding with a spatula until just combined. Over‑mixing is the enemy here; stop as soon as you no longer see streaks of flour. The batter should be thick but pourable – if it looks too stiff, drizzle in the half‑cup of milk, one tablespoon at a time, until you reach the right consistency.
Watch Out: Adding too much milk will make the batter runny, leading to a flat, dense cake that lacks structure.Pour the batter into the prepared pan, smoothing the top with a spatula. Tap the pan lightly on the counter three times to release any trapped air bubbles – you’ll hear a soft “pop” that signals a smoother crumb.
Bake for 30‑35 minutes, or until a toothpick inserted into the center emerges clean with just a few moist crumbs. Around the 20‑minute mark, the edges will start pulling away from the pan, and the top will develop a deep golden‑brown hue that smells like toasted caramel. Resist the urge to open the oven door early; the sudden temperature drop can cause the cake to sink.
Allow the cake to cool in the pan for 10 minutes, then invert onto a wire rack to finish cooling completely. This step prevents the bottom from becoming soggy and lets steam escape, preserving that crisp crust. While it cools, the kitchen will be filled with a lingering nutty perfume that makes you want to dive right in.
That's it — you did it. But hold on, I've got a few more tricks that'll take this to another level. From serving suggestions that elevate the experience to storage hacks that keep the cake fresh for weeks, we’re about to turn a great cake into a legendary one.
Insider Tricks for Flawless Results
The Temperature Rule Nobody Follows
Never bake a cake straight from the refrigerator. Let the batter sit at room temperature for 15 minutes before it hits the oven; this ensures the butter and milk are evenly distributed, preventing uneven rising. I once rushed this step and ended up with a dome that cracked like a broken egg shell – not pretty.
Why Your Nose Knows Best
The moment the cake’s edges start to turn a deep amber and you catch that caramel scent, you know it’s almost done. Trust your senses over the clock; ovens can vary by up to 25°F, so the visual and olfactory cues are your most reliable guides.
The 5‑Minute Rest That Changes Everything
After removing the cake from the oven, let it rest in the pan for exactly five minutes before turning it out. This short pause lets the steam settle, making the crumb less crumbly and the crust less likely to break apart when sliced.
The Butter‑Glaze Finish
While the cake is still warm, brush it with a mixture of melted butter, a teaspoon of honey, and a pinch of sea salt. This creates a glossy, sweet‑salty glaze that adds an extra layer of complexity. A friend tried skipping this step once – the cake was still good, but the finish felt flat, like a song missing its chorus.
The Cool‑Down Secret
Place the cooled cake on a wire rack with a clean kitchen towel underneath. The towel absorbs any residual moisture, keeping the bottom from getting soggy. This trick is especially useful if you plan to store the cake for a few days.
Creative Twists and Variations
This recipe is a playground. Here are some of my favorite ways to switch things up:
Chocolate Hazelnut Dream
Add 1/3 cup of cocoa powder to the dry ingredients and fold in a handful of mini chocolate chips. The result is a mocha‑infused cake that pairs perfectly with a dollop of whipped cream.
Citrus‑Zest Surprise
Stir in the zest of one orange and replace half the milk with freshly squeezed orange juice. The citrus brightens the nutty base, creating a refreshing flavor that’s ideal for spring brunches.
Spiced Arabian Night
Introduce 1/2 teaspoon of ground cardamom and a pinch of ground cloves to the flour mixture. These warm spices echo the flavors of traditional Egyptian desserts and add an exotic depth.
Nut‑Free Coconut Version
Swap hazelnuts for toasted shredded coconut and use coconut oil instead of butter. The cake becomes tropical, with a chewy texture that’s perfect for a beach‑side picnic.
Berry‑Burst Topping
Top the cooled cake with a mixture of fresh berries, a drizzle of honey, and a sprinkle of powdered sugar. The tartness of the berries cuts through the richness, offering a balanced bite.
Storing and Bringing It Back to Life
Fridge Storage
Wrap the cake tightly in plastic wrap or store it in an airtight container; it will stay fresh for up to five days. The cool environment keeps the crumb moist while preserving the nutty flavor.
Freezer Friendly
Slice the cake, then place each piece between parchment sheets before sealing them in a freezer bag. It freezes beautifully for up to three months. When you’re ready to enjoy, let a slice thaw at room temperature for 20 minutes.
Best Reheating Method
To revive a slice, preheat your oven to 300°F (150°C), place the piece on a baking sheet, and add a tiny splash of water to the edge of the slice. Cover loosely with foil and heat for 8‑10 minutes; the steam will bring back that fresh‑baked softness.