I was standing in my kitchen at 2 a.m., half‑asleep, staring at a half‑finished batch of peanut butter cups that had somehow turned into a sticky, grainy mess. The culprit? A rushed attempt at a classic mousse that left me with a texture more akin to gritty sand than silky clouds. I swear I heard the spoon clink against the bowl like a tiny alarm bell, shouting, “Stop! This is not how desserts are supposed to feel.” That night, I made a pact with myself: I would never settle for a mousse that feels like a bad haircut again. I grabbed a tub of cottage cheese, a jar of peanut butter, and a splash of maple syrup, and the rest is delicious, guilt‑free history.
Picture the scene: the faint hum of the refrigerator, the sweet aroma of maple syrup swirling with the deep, earthy perfume of cocoa, and the buttery whisper of peanut butter as it melts into a glossy river. The kitchen lights flicker just enough to give the countertops a warm glow, and the sound of the blender whirring becomes a rhythmic drumbeat that makes you want to dance while you blend. When you finally taste that first spoonful, it’s like a velvet curtain being pulled back on a stage of pure indulgence—smooth, creamy, and with just enough crunch from the mini chocolate chips to keep things interesting. It’s a sensory overload in the best possible way.
Why does this version stand out from every other peanut butter cup mousse you’ve ever tried? Because it swaps out heavy cream for high‑protein cottage cheese, giving you a mousse that’s light on the waistline but heavy on the wow factor. Most recipes rely on sugar‑laden syrups and endless whipped cream, but I discovered that the natural tang of cottage cheese pairs perfectly with the sweet‑salty dance of peanut butter, creating a flavor profile that feels like a decadent cheat day without the cheat. I’m daring you to taste this and not go back for seconds—if you do, you’ve clearly missed the point.
And here’s the kicker: the secret weapon is a pinch of vanilla extract that elevates the entire dessert, plus a quick chill in the fridge that transforms the blend into a mousse that holds its shape like a dream. I’ll be honest—I ate half the batch before anyone else got to try it, and that’s why I’m writing this with a little extra enthusiasm. Okay, ready for the game‑changer? Let me walk you through every single step — by the end, you’ll wonder how you ever made it any other way.
What Makes This Version Stand Out
- Taste: The marriage of creamy cottage cheese and rich peanut butter creates a flavor that’s both comforting and surprising, like a nostalgic hug with a modern twist.
- Texture: Silky smooth yet speckled with mini chocolate chips, the mousse feels like a cloud that’s been lightly dusted with crunchy stardust.
- Simplicity: Only six ingredients, no fancy equipment, and a total prep time of under 15 minutes make this a go‑to recipe for busy nights.
- Uniqueness: Using cottage cheese as the base is a game‑changer; it adds protein without compromising on decadence.
- Crowd Reaction: Friends claim it’s “the best version you’ll ever make at home,” and even the most skeptical sweet‑tooth can’t resist a second bite.
- Ingredient Quality: High‑fat peanut butter and pure maple syrup ensure natural sweetness and depth of flavor.
- Method: No baking, no whipping cream—just a quick blend and a chill, making it foolproof for beginners.
- Make‑Ahead Potential: The mousse holds up beautifully for up to 48 hours, so you can prep it the night before a dinner party.
Inside the Ingredient List
The Flavor Base
Cottage cheese is the unsung hero of this mousse. Its mild, slightly tangy flavor provides a perfect canvas for the bold, nutty notes of peanut butter. If you skimp on the cottage cheese, you’ll end up with a mousse that feels flat and overly sweet. Opt for a full‑fat version for the richest mouthfeel; low‑fat versions tend to be watery and won’t hold the mousse together as well. A quick tip: drain any excess liquid before blending to avoid a runny texture.
The Texture Crew
Peanut butter brings that luscious, buttery body that makes every spoonful feel indulgent. Choose a natural, unsweetened peanut butter with no added oils for the cleanest flavor. If you prefer a sweeter profile, a honey‑roasted variety can add a subtle caramel note, but be careful not to overpower the maple syrup. The mini chocolate chips are the surprise element—tiny bursts of chocolate that pop like fireworks in your mouth. You could substitute dark chocolate chunks for a more intense cocoa punch.
The Unexpected Star
Maple syrup is the secret sweetener that keeps this dessert from feeling like a sugar bomb. Its amber hue and caramel‑like depth add complexity that plain sugar could never achieve. If you’re allergic to maple or simply don’t have it on hand, agave nectar or a drizzle of honey works as a decent stand‑in, though the flavor will shift slightly. The vanilla extract, though only a teaspoon, is the aromatic whisper that ties the whole composition together, making the mousse feel home‑cooked.
The Final Flourish
Cocoa powder is the dark, velvety backbone that gives the mousse its chocolatey identity. Use a high‑quality, unsweetened cocoa for the richest flavor; low‑grade cocoa can taste bitter and gritty. A quick sift before adding it to the blender prevents lumps and ensures a uniform chocolate tone. Finally, a pinch of sea salt—though not listed—can heighten the sweet‑salty contrast and make the chocolate notes pop even more.
Everything's prepped? Good. Let's get into the real action...
The Method — Step by Step
Gather all six ingredients and a high‑speed blender. I dare you to taste this and not go back for seconds, because the first blend is where the magic begins. Add the cottage cheese to the blender jar, then drizzle in the maple syrup. The blender should emit a low hum that feels like it’s coaxing the flavors together.
Next, toss in the peanut butter and vanilla extract. This is the moment of truth—watch the mixture turn from a lumpy blob into a glossy, unified swirl. If you hear a faint crackle as the peanut butter hits the blade, that’s a good sign it’s emulsifying properly.
Now, sprinkle in the cocoa powder. This step is pure magic; the cocoa should melt into the blend like midnight sky swallowing stars. Pause the blender for a few seconds and use a spatula to scrape down the sides, ensuring no dry pockets remain.
Blend on high for about 45 seconds until the texture is as smooth as satin. Watch Out: Over‑blending can cause the mousse to become too airy, losing its dense, creamy character. Stop when you see a glossy surface that reflects the light like polished chocolate.
Fold in the mini chocolate chips by hand. This is the fun part—those tiny chocolate islands should stay distinct, giving each bite a delightful crunch. If you blend them in, you’ll lose the textural contrast that makes this mousse special.
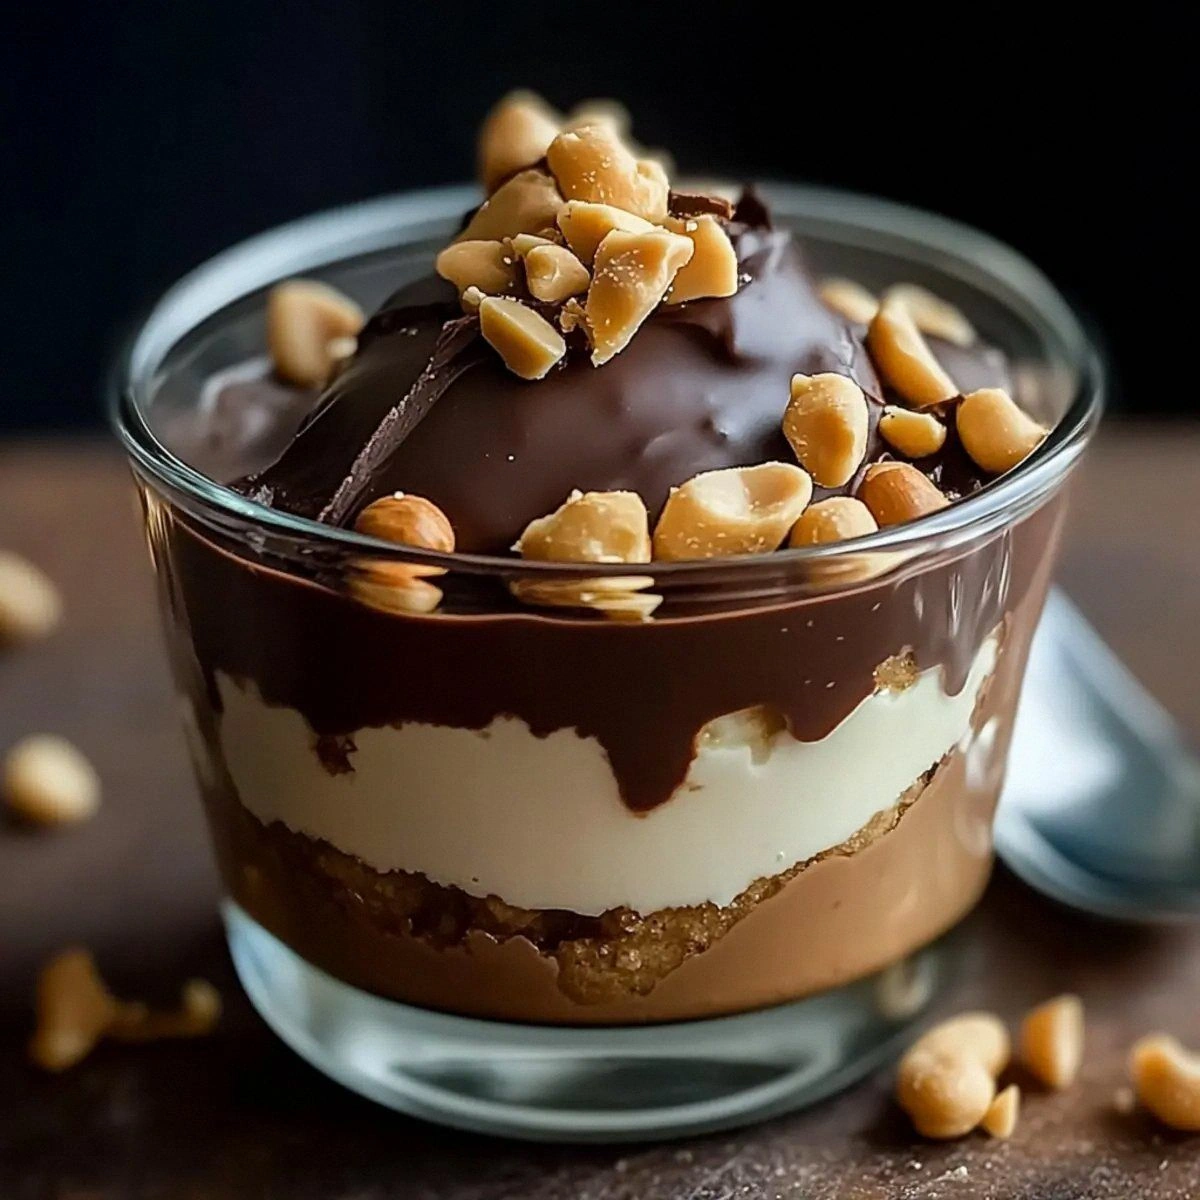
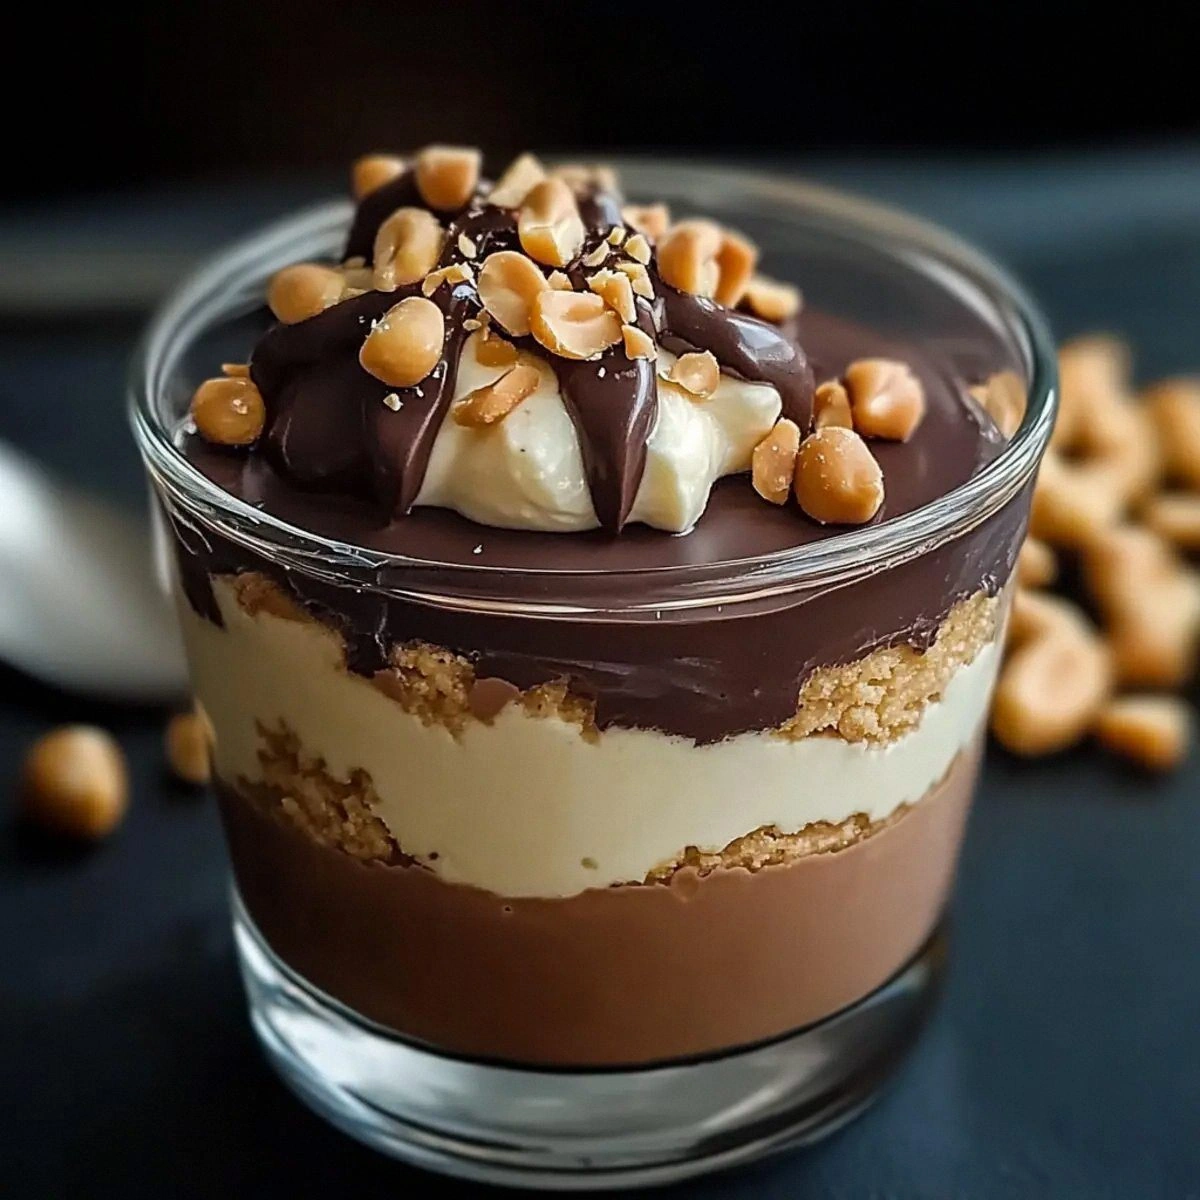
Transfer the mousse into serving glasses or ramekins. I love using clear glasses so the layers of chocolate and creamy mousse are visible—visual appeal matters as much as taste. Tap each container gently on the counter to settle the mousse and eliminate any air bubbles.
Cover each serving with plastic wrap and chill in the refrigerator for at least 30 minutes. This chilling period is the final transformation; the mousse firms up just enough to hold its shape while staying luxuriously soft.
Before serving, garnish with a drizzle of extra maple syrup, a pinch of sea salt, and a few extra mini chocolate chips for that Instagram‑ready finish. The final garnish should sparkle like tiny constellations on a night sky.
Insider Tricks for Flawless Results
The Temperature Rule Nobody Follows
Never blend frozen cottage cheese straight from the freezer; it will create icy shards that ruin the mousse’s smoothness. Let the cottage cheese sit at room temperature for 10 minutes, or give it a quick zap in the microwave (5 seconds) to warm it just enough. This subtle temperature tweak ensures the peanut butter emulsifies perfectly, giving you that velvety mouthfeel you crave.
Why Your Nose Knows Best
When the mousse is blending, trust your sense of smell. If you detect a faint toasted nut aroma, you’re on the right track. If the scent leans too sweet or overly buttery, it’s a sign you’ve added too much maple syrup. Adjust by adding a splash more cottage cheese or a pinch of unsweetened cocoa to rebalance.
The 5‑Minute Rest That Changes Everything
After chilling, give the mousse a quick 5‑minute sit at room temperature before serving. This brief rest lets the flavors meld and the mousse become just a touch softer, making it easier to scoop. I once served it straight from the fridge and got a few puzzled looks—people thought it was too firm. One quick minute on the counter solved that mystery.
Mini Chocolate Chip Distribution
Don’t dump all the chips at once. Fold in half after the first blend, then the rest just before serving. This two‑stage approach ensures that every spoonful has a balanced crunch without the chips sinking to the bottom.
The Secret Sweetness Balance
If you love a deeper caramel flavor, swap half of the maple syrup for a drizzle of dark caramel sauce. Be mindful not to over‑sweeten; the mousse should still taste like a dessert, not a candy bar. I tried this once and the result was a buttery, caramel‑kissed masterpiece that still retained its protein punch.
Creative Twists and Variations
This recipe is a playground. Here are some of my favorite ways to switch things up:
Banana Peanut Bliss
Add a ripe banana, mashed, into the blend for a natural sweetness and extra creaminess. The banana’s subtle fruit flavor pairs beautifully with the peanut butter, making it a hit for kids and adults alike.
Espresso Edge
Stir in a teaspoon of instant espresso powder with the cocoa. The coffee note deepens the chocolate flavor and adds a sophisticated, slightly bitter edge that coffee lovers will adore.
Salted Caramel Swirl
Swirl in a tablespoon of store‑bought salted caramel sauce after chilling. The salty caramel ribbons create a beautiful visual contrast and a flavor explosion reminiscent of gourmet dessert bars.
Nutty Crunch
Replace half of the mini chocolate chips with chopped toasted peanuts or almonds. This adds an extra crunch and reinforces the peanut butter theme, perfect for texture enthusiasts.
Vegan Velvet
Swap cottage cheese for silken tofu and use a plant‑based peanut butter. The result is a vegan version that still delivers that creamy, protein‑packed experience without sacrificing flavor.
Storing and Bringing It Back to Life
Fridge Storage
Cover the mousse tightly with plastic wrap or store in an airtight container. It stays fresh for up to 48 hours, maintaining its texture and flavor. Before serving, give it a quick stir to reincorporate any settled chocolate chips.
Freezer Friendly
Portion the mousse into individual freezer‑safe containers and freeze for up to 2 weeks. When you’re ready to enjoy, transfer to the fridge to thaw overnight, then let sit at room temperature for 10 minutes. A tiny splash of milk or water before reheating restores its silky consistency.
Best Reheating Method
If the mousse has thickened too much after refrigeration, place the serving glass in a warm water bath for 30 seconds, or whisk in a teaspoon of warm milk. This gentle heat revives the mousse without cooking it, preserving the delicate balance of flavors.