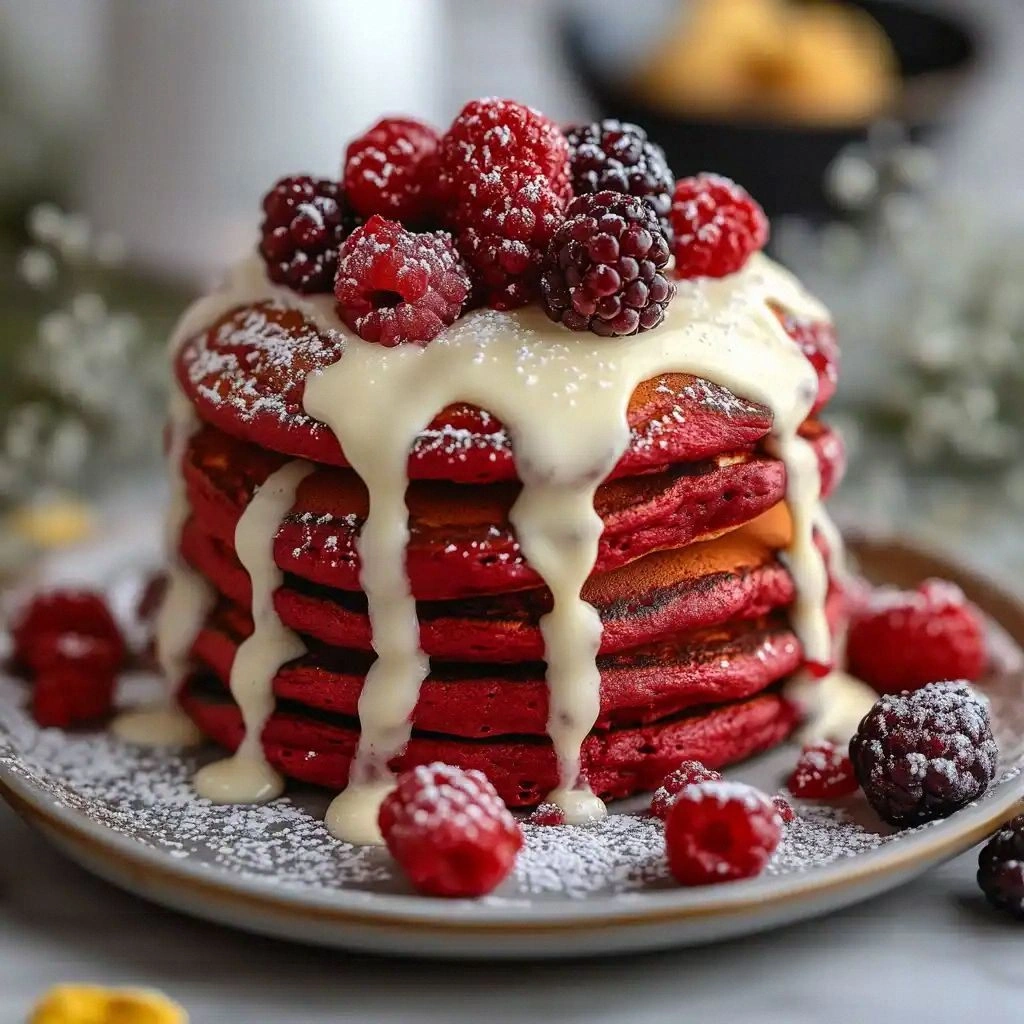
If you’ve ever struggled with fluffy pancakes that turn out flat or overly dense, you’re not alone—and I’ve got the fix. Picture yourself pulling this out of the pan, the whole kitchen smelling incredible, and the family or friends staring in awe as the stack rises like a miniature volcano. That sizzle when it hits the pan? Absolute perfection. Stay with me here—this is worth it. Let me walk you through every single step, and by the end, you’ll wonder how you ever made it any other way.
What Makes This Version Stand Out
- Flavor Depth: The subtle cocoa infusion gives the batter a chocolate undertone that pairs beautifully with the bright red hue, creating a multi‑layered taste experience that’s both sweet and slightly bitter.
- Texture Triumph: The combination of buttermilk and eggs, along with a short rest, ensures a tender crumb that feels like a cloud but holds the frosting without collapsing.
- Visual Impact: The vibrant crimson color, achieved with a small amount of red food coloring, turns breakfast into a feast for the eyes and the palate.
- Ease of Prep: All steps are straightforward, and the batter can be made ahead of time for busy mornings, making this recipe a lifesaver for brunches and special occasions.
- Crowd Appeal: The bold color and decadent frosting make it a showstopper that impresses guests, from toddlers to adults.
- Ingredient Quality: Using fresh buttermilk, real cream cheese, and high‑quality cocoa powder elevates the flavor profile beyond the standard pancake.
- Make‑Ahead Potential: The batter can be refrigerated up to 24 hours, and the frosting can be pre‑made and stored, so you’re never scrambling.
- Balanced Sweetness: The frosting’s powdered sugar is just enough to sweeten without overpowering the delicate pancake base.
Alright, let’s break down exactly what goes into this masterpiece…
Inside the Ingredient List
The Flavor Base
All-purpose flour is the backbone of this batter, providing structure while keeping the pancakes light. Using 1¾ cups ensures a balanced ratio with the liquids; too much flour would make the pancakes dry, while too little would cause them to collapse. If you’re feeling adventurous, a touch of almond flour can add a nutty undertone, but keep the total flour amount consistent.
Cocoa powder is the secret weapon that introduces a subtle chocolate flavor. Two tablespoons are enough to give depth without overwhelming the vanilla notes. If you prefer a stronger chocolate taste, you can bump this up to three tablespoons, but remember the color will shift slightly toward a darker brown.
The Texture Crew
Granulated sugar, at two tablespoons, sweetens the batter just enough to balance the acidity of buttermilk. It also contributes to the golden-brown crust. If you’re watching calories, you can reduce sugar to one tablespoon, but the pancakes will be slightly less caramelized.
Baking powder and baking soda work together to lift the pancakes. The two teaspoons of baking powder provide the primary lift, while the half teaspoon of baking soda reacts with the buttermilk’s acidity, creating those coveted airy pockets. Skipping either will result in denser, flatter pancakes.
Salt, at half a teaspoon, is essential for flavor enhancement. It brings out the richness of the cocoa and balances the sweetness. A pinch of salt is also a common kitchen hack to prevent over-sweetness in desserts.
The Unexpected Star
Buttermilk is the unsung hero that adds tang and moisture. Its acidity reacts with the leavening agents, creating a light, fluffy texture. If you don’t have buttermilk on hand, combine one cup of milk with one tablespoon of lemon juice and let it sit for five minutes; this mimics the acidity and keeps the pancakes airy.
Eggs bind the batter and add richness. Two large eggs provide structure and a subtle egg flavor that complements the chocolate undertone. For a vegan version, replace eggs with flaxseed meal and water, but the texture will differ.
The Final Flourish
Melted butter adds a silky mouthfeel and helps the pancakes brown beautifully. Two tablespoons are sufficient to keep the batter moist without making it greasy. If you prefer, you can use coconut oil for a tropical twist, but be aware it will alter the flavor slightly.
Vanilla extract, at one teaspoon, brings warmth and depth. It balances the cocoa’s bitterness and enhances the overall sweetness. For a more pronounced vanilla note, increase to two teaspoons, but be careful not to overpower the chocolate.
Red food coloring, at one teaspoon, is the visual magic. It turns the batter into a vivid crimson, making the pancakes Instagram-worthy. A little goes a long way; too much can make the batter look artificial. Use a natural dye like beet juice for a healthier alternative, though it may alter the flavor.
Everything's prepped? Good. Let's get into the real action…
The Method — Step by Step
- Heat a 12‑inch nonstick skillet or griddle over medium heat. Lightly oil with a paper towel dipped in melted butter, making sure the surface is slick but not greasy. This pre‑heat step is crucial; a hot pan ensures a crisp edge and prevents sticking. Once the butter shimmers, it’s ready for batter.
- In a large bowl, whisk together 1¾ cups flour, 2 tablespoons cocoa powder, 2 tablespoons granulated sugar, 2 teaspoons baking powder, ½ teaspoon baking soda, and ½ teaspoon salt. Use a whisk to combine dry ingredients thoroughly, ensuring no lumps form. This dry mix sets the stage for the batter’s texture.
- In a separate bowl, beat 1 cup buttermilk, 2 large eggs, 2 tablespoons melted butter, 1 teaspoon vanilla extract, and 1 teaspoon red food coloring until the mixture is smooth and glossy. The color will start to seep into the liquid, giving it an even hue. This wet mix should be glossy; any streaks indicate under‑whisking.
- Pour the wet mixture into the dry ingredients and stir gently with a rubber spatula. Fold until just combined; a few lumps are acceptable. Over‑mixing can develop gluten, resulting in tough pancakes. The batter should be thick but pourable.
- Let the batter rest for five minutes at room temperature. This short rest allows the leavening agents to activate fully, giving the pancakes their airy lift. Cover loosely with a clean towel to keep the batter from drying out.
- Return the skillet to medium heat and swirl to coat. Drop a ¼ cup of batter onto the skillet for each pancake. The batter should spread slightly, forming a 4‑inch circle. The edges will begin to lift after 2–3 minutes; a golden crust will form.
- When bubbles appear on the surface and the edges start to pull away, flip the pancake with a wide spatula. Cook for an additional 30–45 seconds, until the second side is golden brown. The inside should feel firm but still moist.
- Repeat with the remaining batter, adding more butter to the skillet as needed. Stack the finished pancakes on a plate and cover loosely with foil to keep them warm.
- While the pancakes rest, prepare the cream cheese frosting. In a bowl, beat 4 ounces of softened cream cheese, ¼ cup powdered sugar, 2 tablespoons milk, and ½ teaspoon vanilla extract until smooth and fluffy. The frosting should be spreadable but not runny. Adjust thickness by adding more powdered sugar or milk as needed.
- Once the pancakes are warm, spread a generous layer of frosting on each stack. The frosting melts slightly, creating a luscious, velvety surface that complements the chocolate undertone. Serve immediately for the best texture.
That’s it — you did it. But hold on, I've got a few more tricks that'll take this to another level. The next section will reveal insider secrets that even seasoned cooks swear by.
Insider Tricks for Flawless Results
The Temperature Rule Nobody Follows
Many bakers believe medium heat is always best, but the truth is a two‑stage approach works wonders. Start at medium‑low to let the batter cook through without burning the edges, then raise to medium for the final crisp. This ensures a golden crust while keeping the inside tender. I once flipped my pancakes at too high a temperature and ended up with a burnt exterior and raw center. That’s why I always test the heat with a small drop of batter; if it sizzles gently, you’re good.
Why Your Nose Knows Best
Your nose is a reliable judge of doneness. When the batter starts to bubble and the edges lift, a faint, sweet aroma will fill the air. That scent signals it's time to flip. I’ve had friends who rely on the “look” alone and end up flipping too early, ruining the texture. Trust your senses; they’re more accurate than a stopwatch.
The 5‑Minute Rest That Changes Everything
Resting the batter for five minutes might seem trivial, but it’s the secret to a fluffy crumb. During this time, the gluten relaxes, and the leavening agents fully activate. Skipping this step leads to dense pancakes that clump together. If you’re short on time, a quick 30‑second rest still helps, but the full five minutes yield the best results.
The Cream Cheese Trick
When whipping the frosting, add the powdered sugar gradually, about a tablespoon at a time. This prevents clumping and ensures a silky finish. I once added all the sugar at once and ended up with a gritty frosting. That small tweak made all the difference. Remember, the frosting should be thick enough to hold its shape but still spread easily.
The Tiny Splash of Water
If you’re reheating leftover pancakes, add a splash of water to the skillet before cooking. The steam helps re‑soften the batter without drying it out. I’ve had pancakes that turned out rubbery after reheating; this trick keeps them tender and fluffy. It’s a simple, game‑changing hack that most people overlook.
Creative Twists and Variations
This recipe is a playground. Here are some of my favorite ways to switch things up:
Chocolate‑Berry Swirl
Fold fresh blueberries or raspberries into the batter before cooking. The berries burst, adding a juicy pop that complements the chocolate undertone. This variation is perfect for a spring brunch and adds a natural sweetness.
Nutty Crunch
Add ¼ cup chopped pecans or walnuts to the batter. The nuts provide a delightful crunch and a nutty flavor that pairs with the chocolate. Serve with a drizzle of maple syrup for an extra indulgent touch.
Citrus Zest
Incorporate the zest of one orange or lemon into the wet mixture. The citrus adds a bright, fresh note that balances the richness of the cream cheese frosting. It’s a simple tweak that transforms the flavor profile.
Almond Joy
Replace half of the cocoa powder with unsweetened almond flour and add a tablespoon of almond extract. The result is a nutty, chocolate‑almond fusion that’s reminiscent of a classic candy bar. This version is a hit with almond lovers.
Vegan Velvet
Swap the eggs for flaxseed meal mixed with water, use plant‑based milk, and replace butter with coconut oil. For frosting, blend vegan cream cheese with a bit of coconut milk. The texture will differ slightly, but the flavor remains rich and indulgent.
Breakfast Bowl Edition
Cut the pancakes into bite‑size squares and serve them in a bowl with fresh fruit, a drizzle of honey, and a dollop of whipped coconut cream. This makes a hearty breakfast bowl that’s both portable and satisfying. It’s a great option for a quick, on‑the‑go meal.
Storing and Bringing It Back to Life
Fridge Storage
Cool the pancakes completely, then stack them with parchment paper between each layer. Place the stack in an airtight container and refrigerate for up to 3 days. The frosting will stay firm, but you can top each stack with a fresh dollop before serving.
Freezer Friendly
Wrap each pancake individually in plastic wrap, then place them in a freezer bag. They’ll stay fresh for up to 2 weeks. When you’re ready to enjoy, thaw at room temperature for 30 minutes before reheating.
Best Reheating Method
Reheat in a skillet over medium heat, adding a splash of water to the pan. Cook for 2–3 minutes on each side, or until the pancakes are heated through and the frosting is slightly melted. This method preserves the moisture and restores the fluffy texture.