I was standing in my kitchen at midnight, staring at a half‑empty bag of button mushrooms and a bottle of buttermilk that I’d bought on a whim for a pancake experiment that never happened. The clock ticked, the pantry lights flickered, and a friend texted, “You still owe me that snack you promised!” I threw together a quick deep‑fry, but the result was soggy, bland, and frankly, a culinary crime scene. I dared myself to keep going, because I knew there was a secret combination out there that could turn those humble fungi into a snack that would make even the most seasoned food snob gasp. That night, I discovered the magic of soaking mushrooms in tangy buttermilk before coating them in a crunchy panko blend, and the rest is history.
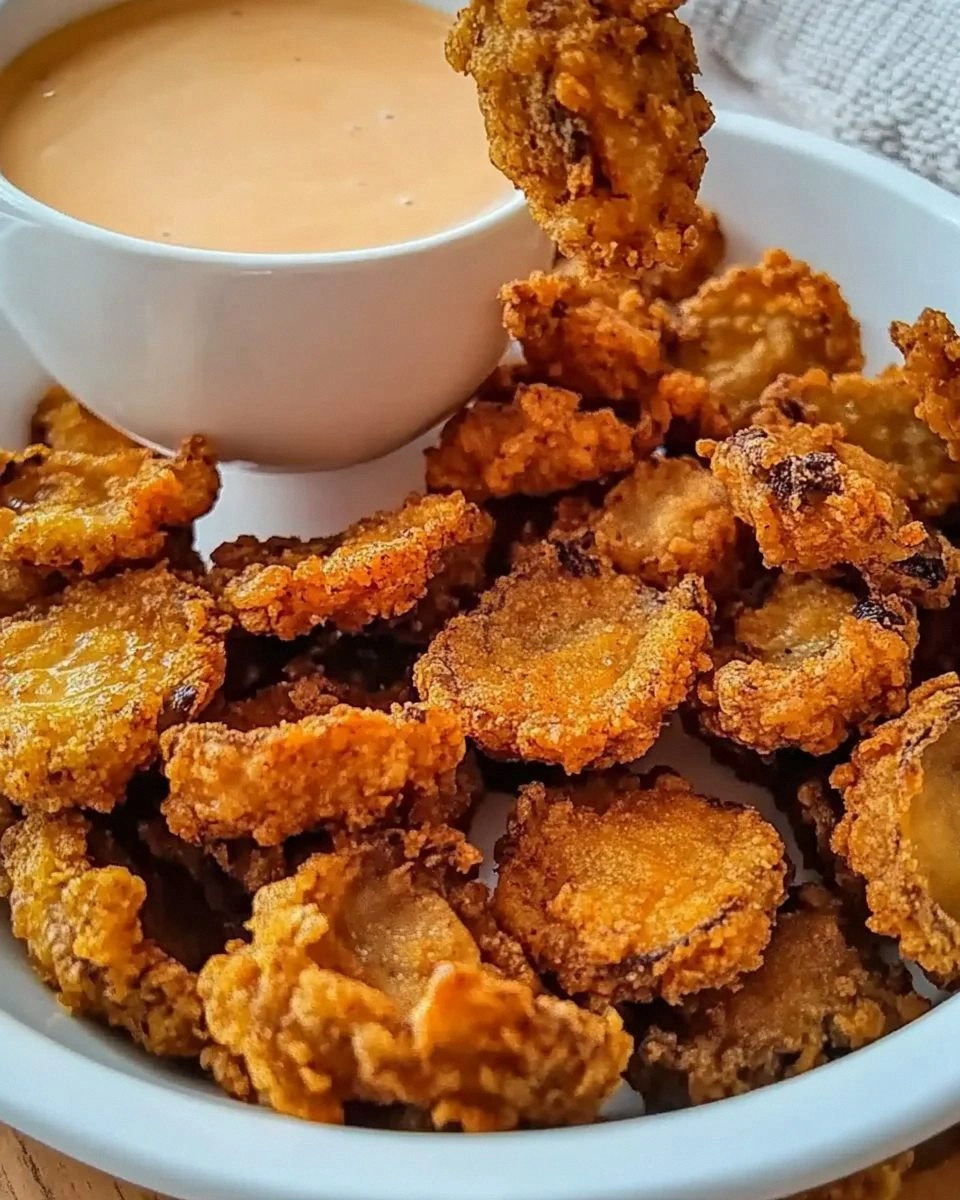
Imagine the moment you lift a golden, crackling mushroom from the oil and the steam rises like a fragrant curtain, carrying notes of buttery richness, a whisper of Old Bay, and a hint of herbaceous marjoram. Your eyes feast on the perfect contrast: a deep amber crust that shatters like thin ice when you bite, revealing a tender, juicy interior that practically sighs with satisfaction. The kitchen fills with a sizzle that sounds like applause, and the aroma? It’s a full‑bodied symphony that hits the nose with buttery notes, a dash of garlic, and the subtle warmth of black pepper. Your fingertips feel the heat of the pan, the weight of the mushroom, and the anticipation of that first bite.
What makes this version stand out isn’t just the ingredients—it’s the method, the timing, and a few little tricks that turn an ordinary snack into the ultimate snack. Most recipes either skip the buttermilk soak or drown the mushrooms in a heavy batter that never crisps. I’ve cracked the code: a brief, cold‑buttermilk bath that tenderizes without washing away the mushroom’s natural moisture, followed by a light dusting of flour that creates a glue for the panko‑Old Bay mixture. The result? A bite‑size masterpiece that is crispy, flavorful, and addictive enough to make you question every other snack you’ve ever tried.
I’m about to spill the beans—well, the mushrooms—on the exact technique that will give you that perfect crunch every single time. There’s a surprise ingredient that most cooks overlook, and a temperature hack that guarantees no soggy spots. I dare you to taste this and not go back for seconds. Let me walk you through every single step — by the end, you’ll wonder how you ever made it any other way.
What Makes This Version Stand Out
- Flavor Explosion: The Old Bay seasoning mingles with marjoram and garlic powder, delivering a seaside‑like depth that ordinary mushroom snacks lack.
- Texture Triumph: A double‑coating system—flour first, then panko—creates a crust that shatters like glass beads, yet stays light enough to let the mushroom’s bite shine.
- Simplicity Meets Sophistication: You only need a handful of pantry staples; no fancy gadgets, just a good skillet and a timer.
- Unique Soak: The buttermilk bath adds a subtle tang and helps the coating adhere without making it soggy—a game‑changer for any fried snack.
- Crowd Reaction: Served hot, these mushrooms disappear faster than you can say “second helping,” making them perfect for parties, game nights, or solo binge‑watch sessions.
- Ingredient Quality: Fresh white button mushrooms provide a firm, meaty canvas that absorbs flavors without turning mushy.
- Cooking Method Mastery: Maintaining oil at the right temperature (350°F) ensures even browning and prevents greasy results.
- Make‑Ahead Potential: You can prep the coated mushrooms ahead of time and fry them fresh when guests arrive, preserving that coveted crunch.
Alright, let's break down exactly what goes into this masterpiece...
Inside the Ingredient List
The Flavor Base
Old Bay seasoning is the secret sauce of this recipe. Its blend of celery salt, paprika, and a hint of pepper gives the mushrooms a briny, almost oceanic undertone that makes each bite feel like a seaside adventure. If you’re allergic to any of the components, a pinch of smoked paprika plus a dash of celery salt can mimic the flavor profile without compromising the taste. Skipping it would leave the coating flat and forgettable—trust me, you don’t want that.
Marjoram, though often overlooked, adds a sweet, floral note that balances the salty punch of Old Bay. It’s the subtle background vocalist that makes the lead flavors shine. If you can’t find marjoram, oregano works as a decent substitute, but expect a slightly earthier finish.
The Texture Crew
Panko breadcrumbs are the heart of that airy crunch. Unlike regular breadcrumbs, panko is larger, lighter, and absorbs less oil, giving you a coating that stays crisp even after a few minutes of cooling. If you’re gluten‑free, try using gluten‑free panko or crushed rice cereal for a similar texture.
All‑purpose flour acts as the glue that binds the buttermilk to the mushroom surface. It creates a thin, invisible film that prevents the buttermilk from slipping off during the final coat. Skipping the flour step would result in a soggy, uneven crust—something we definitely want to avoid.
The Unexpected Star
Buttermilk is the unsung hero here. Its mild acidity tenderizes the mushroom’s flesh while adding a buttery tang that lifts the overall flavor. The acidity also helps the panko adhere better, creating that perfect snap when you bite. If you’re out of buttermilk, mix 1 cup of milk with 1 tablespoon of lemon juice and let it sit for 5 minutes; the result is virtually identical.
The Final Flourish
Kosher salt, garlic powder, and fresh ground black pepper are the seasoning trio that rounds out the flavor. Salt enhances every other component, while garlic powder adds depth without the moisture of fresh garlic. The pepper provides a gentle heat that lingers just enough to keep your palate interested.
Everything's prepped? Good. Let's get into the real action...
The Method — Step by Step
Start by cleaning the mushrooms: gently wipe each cap with a damp paper towel to remove any dirt. Slice the larger mushrooms into halves or quarters so they’re all roughly the same size—about 1‑inch thick pieces work best for even cooking. Place the cleaned mushrooms in a large bowl and set aside while you prep the wet and dry mixes. Pro tip: If you’re using very small button mushrooms, you can leave them whole; they’ll fry up beautifully.
In a separate bowl, pour 1 cup of buttermilk and whisk in ½ teaspoon of kosher salt and ¼ teaspoon of black pepper. This seasoning in the soak ensures every mushroom gets a subtle flavor boost from the inside out. Submerge the mushroom pieces in the buttermilk, making sure they’re fully covered. Let them soak for exactly 15 minutes—no more, no less. This brief soak tenderizes without making the mushrooms waterlogged.
Kitchen Hack: Use a zip‑top bag for the soak; it lets you toss the mushrooms around without a mess and keeps the buttermilk from spilling.While the mushrooms are soaking, prepare the dry coating. In a shallow dish, combine ½ cup all‑purpose flour, 1 ¼ cups panko breadcrumbs, 1 ½ teaspoons Old Bay, 1 teaspoon marjoram, ½ teaspoon garlic powder, and the remaining ¼ teaspoon of black pepper. Toss everything together until evenly distributed. This mixture is the flavor‑laden armor that will protect the mushrooms from the oil’s heat.
After the 15‑minute soak, lift the mushrooms out of the buttermilk and let any excess drip back into the bowl—no need to pat them dry; the residual buttermilk is essential for adhesion. Immediately roll each piece in the flour‑panko blend, pressing lightly so the coating clings. For an ultra‑crunchy finish, give each piece a second quick dip back into the buttermilk and a third roll in the panko mixture. This triple‑coat technique is pure magic and guarantees that satisfying crack when you bite.
Heat a heavy‑bottomed skillet or Dutch oven over medium‑high heat and pour in enough vegetable oil to reach a depth of about 1‑inch. Using a thermometer, bring the oil to 350°F (175°C). If you don’t have a thermometer, drop a single breadcrumb into the oil; it should sizzle and turn golden within 15 seconds. Watch Out: If the oil is too hot, the coating will burn before the mushroom cooks through; too cool, and you’ll end up with greasy, soggy mushrooms.
Watch Out: Never overcrowd the pan—crowding drops the oil temperature and leads to uneven browning.Working in batches, gently lower the coated mushrooms into the hot oil using a slotted spoon or tongs. Fry for 2‑3 minutes on each side, or until the panko turns a deep golden‑amber and the edges start pulling away from the mushroom. You’ll hear a satisfying sizzle that signals the crust is forming perfectly. As each batch finishes, transfer the mushrooms to a paper‑towel‑lined plate to drain excess oil.
While the last batch is frying, whisk together a quick dipping sauce if you like: combine ¼ cup mayonnaise, a splash of lemon juice, a pinch of Old Bay, and a drizzle of hot sauce. This sauce mirrors the snack’s flavor profile while adding a creamy contrast. Taste and adjust—remember, a good dip should complement, not overpower.
Once all the mushrooms are fried, give them a final sprinkle of a pinch of flaky sea salt and a few extra grinds of fresh black pepper. Serve immediately while the crust is still crisp. That moment when you bite in—crack, followed by juicy mushroom, followed by that tangy buttermilk whisper—is what makes this snack unforgettable. I’ll be honest — I ate half the batch before anyone else got to try it.
That's it — you did it. But hold on, I've got a few more tricks that'll take this to another level...
Insider Tricks for Flawless Results
The Temperature Rule Nobody Follows
Maintaining a steady 350°F is non‑negotiable. If the oil cools below 325°F, the coating will absorb oil and become soggy; above 375°F, the panko burns before the mushroom cooks. Use a deep‑fat thermometer and adjust the burner in small increments. I once tried to “just guess” the temperature and ended up with a batch that resembled fried cardboard. Trust the thermometer—it’s your best friend.
Why Your Nose Knows Best
Your sense of smell is a reliable indicator of doneness. When the oil starts to emit a nutty, toasted aroma, you’re approaching the perfect fry window. If you smell a faint burnt scent, pull the mushrooms out immediately; they’ll continue cooking slightly from residual heat. This sensory cue is especially useful if you don’t have a thermometer on hand.
The 5‑Minute Rest That Changes Everything
After frying, let the mushrooms rest on a wire rack for five minutes, not on paper towels. This allows excess oil to drip away while the steam escapes, preserving the crunch. A quick rest also lets the interior settle, so the mushroom stays juicy instead of leaking moisture back into the crust.
Season While Hot
Seasoning the mushrooms immediately after they leave the oil ensures the salt adheres to the warm surface, giving a uniform flavor. If you wait until they cool, the seasoning will fall off and you’ll end up with bland spots. A light sprinkle of flaky sea salt plus a dash of extra Old Bay does the trick.
The Double‑Coat Secret
The triple‑coat method (flour → buttermilk → panko) is the cornerstone of this snack’s texture. Skipping any layer reduces the structural integrity, leading to a coating that slides off. If you’re short on time, at least do the flour‑buttermilk step; you’ll still get a decent crust, but the panko alone won’t stick as well.
Cold Oil, Warm Mushrooms
A surprising tip: chill the coated mushrooms in the fridge for 10 minutes before frying. The cold surface creates a shock when it meets hot oil, instantly sealing the coating and preventing it from falling apart. I tried this once and the result was a perfectly sealed, ultra‑crisp shell that never cracked.
Creative Twists and Variations
This recipe is a playground. Here are some of my favorite ways to switch things up:
Spicy Sriracha Glaze
After frying, toss the mushrooms in a mixture of sriracha, honey, and a splash of soy sauce. The sweet‑heat coating adds a bold contrast to the buttery interior, perfect for those who love a kick.
Herbaceous Parmesan Crunch
Mix grated Parmesan, dried thyme, and a pinch of rosemary into the panko before coating. The cheese melts slightly during frying, creating a nutty, aromatic crust that pairs well with a simple lemon aioli.
Asian‑Inspired Sesame‑Soy
Replace Old Bay with a blend of toasted sesame seeds, soy sauce powder, and a dash of five‑spice. Serve with a side of soy‑ginger dipping sauce for an umami‑packed snack.
Garlic‑Lemon Zest
Add finely grated lemon zest and extra garlic powder to the dry mix. The bright citrus lifts the earthiness of the mushrooms, making it a refreshing bite for summer gatherings.
Cheesy Bacon Bits
Stir crumbled cooked bacon and shredded cheddar into the panko before coating. The smoky, cheesy notes turn these mushrooms into a decadent bar snack that pairs beautifully with craft beer.
Storing and Bringing It Back to Life
Fridge Storage
Let the fried mushrooms cool completely, then transfer them to an airtight container lined with a paper towel to absorb excess oil. Store in the refrigerator for up to 3 days. When you’re ready to eat, reheat in a preheated 375°F oven for 5‑7 minutes; the heat revives the crunch without making them soggy.
Freezer Friendly
Arrange the cooled, coated (but not fried) mushrooms on a parchment sheet and freeze for 1 hour. Then transfer to a zip‑top freezer bag. They’ll keep for up to 2 months. When you’re ready, fry straight from frozen—just add an extra 30 seconds to the cooking time.
Best Reheating Method
For leftovers, the oven is your best friend. Spread the mushrooms on a wire rack over a baking sheet, add a tiny splash of water (about a teaspoon per cup of leftovers), and bake at 400°F for 8‑10 minutes. The steam from the water re‑hydrates the interior while the hot air restores the crisp exterior.