I still remember the exact moment my bruschetta cheese ball obsession began. It was one of those potluck disasters where everyone brought store-bought dips and sad veggie trays, and I was determined to salvage the evening with something that would make people actually excited to eat. I had cream cheese, tomatoes, and basil sitting in my fridge like they were waiting for this exact moment of culinary destiny. What started as a desperate attempt to impress turned into the recipe that now gets requested more than my phone number at singles events.
The first time I served this bruschetta cheese ball, my friend Sarah took one bite and literally stopped mid-conversation to grab three more crackers. That's when I knew I had created something dangerous. The combination of that creamy, herb-packed cheese base with the bright, fresh bruschetta topping creates this perfect storm of flavors that makes people lose all sense of social decorum. I've watched grown adults hover over the appetizer table like vultures, and honestly, I've been that person too.
What makes this version absolutely insane is how it captures everything you love about bruschetta — the juicy tomatoes, the aromatic basil, that hit of garlic — but wraps it around this luxurious cheese ball that spreads like velvet on anything it touches. The contrast between the cool, creamy interior and the fresh, zesty topping creates this temperature and texture play that keeps you coming back for "just one more bite" until suddenly the whole thing has mysteriously disappeared. I dare you to taste this and not go back for seconds, thirds, and possibly breakfast the next morning.
Most recipes get this completely wrong by making the cheese ball too dense or the topping too watery. Here's what actually works: we're creating this perfectly balanced sphere of cream cheese, goat cheese, and Italian herbs that stays firm enough to hold its shape but soft enough to spread effortlessly. Then we crown it with this incredible fresh bruschetta mixture that we let macerate just long enough to intensify the flavors without turning into tomato soup. Picture yourself pulling this out of the oven, the whole kitchen smelling incredible, your guests already hovering with crackers in hand. Let me walk you through every single step — by the end, you'll wonder how you ever made it any other way.
What Makes This Version Stand Out
Creamy Dream Team: We're using a blend of cream cheese and goat cheese that creates this impossibly smooth, tangy base that spreads like butter but holds its shape like a champion. The goat cheese adds this sophisticated edge that makes people ask "what's in this?" in the best possible way. Fresh Factor: The bruschetta topping is made with peak-season tomatoes that we salt and drain to concentrate their flavor, creating this intense tomato essence that tastes like summer in every bite. Most recipes skip this step and end up with watery disappointment. Herb Harmony: We're using both fresh and dried herbs in strategic ways — fresh basil and parsley in the topping for brightness, dried oregano and garlic powder in the cheese ball for depth. This creates layers of flavor that develop as you eat. Texture Triumph: The combination of creamy cheese, juicy tomatoes, and the crunch of whatever you're spreading it on creates this perfect textural contrast that keeps your mouth interested bite after bite. It's like a party where everyone's invited and they all get along perfectly. Make-Ahead Magic: This beauty can be assembled completely ahead of time and just needs the topping added before serving, making it the ultimate stress-free entertaining solution. I've made this three days ahead and it tasted even better as the flavors melded. Crowd Psychology: There's something about a cheese ball that makes people gather around like moths to a flame, but when it's topped with fresh bruschetta, it becomes this conversation starter that breaks the ice better than any party game. I've seen strangers become best friends over this thing.Inside the Ingredient List
The Flavor Base
Cream cheese forms the backbone of our cheese ball, providing that familiar tang and spreadable texture that makes this appetizer so addictive. We're using full-fat cream cheese here because this is not the time for diet food — you want that rich, luxurious mouthfeel that makes people close their eyes when they taste it. Let it soften completely before mixing or you'll end up with lumpy disappointment that no amount of mixing can fix. If you're in a rush, cube it and microwave for 15-second bursts, but honestly, patience here pays off in texture.
Goat cheese is our secret weapon for adding complexity and that slight tang that elevates this from ordinary to extraordinary. The creamy, slightly acidic nature of goat cheese cuts through the richness of the cream cheese and adds this sophisticated note that makes people think you went to culinary school. Don't skip this thinking it won't matter — it's the difference between good and "oh my god, what is this?" If goat cheese isn't your thing, you could substitute with extra cream cheese, but you'll lose that special something that makes this recipe memorable.
Fresh garlic is non-negotiable here — we're using real minced garlic, not that jarred stuff that tastes like disappointment and broken dreams. The sharp, pungent flavor of fresh garlic mellows beautifully as it sits in the cheese mixture, creating this gentle warmth that builds with each bite. Press it through a garlic press or mince it super fine so you don't get any aggressive chunks that ruin the smooth texture. And yes, your hands will smell like garlic for hours, but that's just the price of greatness.
The Texture Crew
Shredded mozzarella isn't just for pizza — we're folding this into our cheese mixture for those delightful little cheese pulls and pockets of melty goodness. Use the low-moisture variety, not fresh mozzarella, because we're not trying to create a watery mess that slides off your crackers. The mozzarella adds this mild, milky flavor and creates these tiny stretches when you spread the cheese ball that make people smile involuntarily. If you can't find shredded, buy a block and shred it yourself — the pre-shredded stuff has anti-caking agents that can make your cheese ball feel slightly gritty.
Grated Parmesan brings that umami depth and salty, nutty flavor that makes everything taste more complex than it actually is. We're using the real stuff here, not the powdered sawdust in the green can — this is where you taste the difference. The Parmesan adds these little crystals of salty, savory goodness throughout the cheese ball that create flavor explosions as you eat. Buy a wedge and grate it yourself for maximum impact, or if you must buy pre-grated, look for the fresh stuff in the refrigerated section.
The Unexpected Star
Sun-dried tomatoes packed in oil are going to change your life, or at least your cheese ball game. These intense little flavor bombs add this concentrated tomato sweetness and chewy texture that fresh tomatoes just can't deliver. Chop them super fine so they distribute throughout the cheese ball without creating big chunks that fall off your cracker. The oil they're packed in is liquid gold — save it and drizzle it over the finished cheese ball for extra flavor and shine.
Italian seasoning might seem basic, but it's the backbone that ties all our Italian flavors together into a cohesive, authentic-tasting experience. We're using a quality blend here, not something that's been sitting in your spice rack since the Clinton administration. The combination of oregano, basil, thyme, and rosemary creates this familiar Italian restaurant aroma that makes people feel instantly comfortable and hungry. If your Italian seasoning smells like nothing when you open the jar, it's time for a new one — spices lose their potency faster than you think.
The Final Flourish
Fresh basil is what makes the bruschetta topping sing — we're talking about those bright, peppery, slightly sweet leaves that taste like summer sunshine. Stack the leaves, roll them into a cigar, and slice them into ribbons (this is called a chiffonade if you want to sound fancy at dinner parties). Add the basil right before serving so it stays vibrant green instead of turning that sad, wilted brown that screams "I've been sitting out too long." If fresh basil is impossible to find, you could use fresh parsley, but you'll lose that authentic Italian flavor that makes this a true bruschetta experience.
Cherry tomatoes are our topping superstars because they're naturally sweeter and less watery than their larger cousins, plus they hold their shape beautifully when chopped. We're using a mix of red and yellow varieties for visual appeal — people eat with their eyes first, and those pops of color make this look like a million bucks. Cut them into quarters or sixths depending on their size, making sure they're bite-sized but not so small they turn to mush. The key is salting them and letting them drain for about 15 minutes to concentrate their flavor and prevent a watery topping that slides off the cheese ball like a sad tomato avalanche.
Everything's prepped? Good. Let's get into the real action...
The Method — Step by Step
- Start by letting your cream cheese and goat cheese sit on the counter for at least 30 minutes — this is crucial for achieving that silky-smooth texture that makes people wonder if you secretly went to culinary school. Cold cream cheese is the enemy of smooth texture, and you'll end up with little white lumps that no amount of mixing will eliminate. I know you're impatient, but trust me on this one. While you're waiting, this is the perfect time to prep your sun-dried tomatoes, mince your garlic, and grate your mozzarella if you couldn't find pre-shredded.
- In a large bowl, beat the softened cream cheese and goat cheese together until they're completely combined and smooth as silk — this should take about 2 minutes with an electric mixer on medium speed. Scrape down the sides of the bowl at least twice to make sure everything is incorporated evenly. The mixture should be light and fluffy, almost like you're making cheesecake filling. If you've ever struggled with lumpy cheese balls, you're not alone — and I've got the fix. The key is patience and proper temperature; cold cheese will never cooperate no matter how long you beat it.
- Add the minced garlic, Italian seasoning, garlic powder, and a generous pinch of salt and pepper to the cheese mixture. Beat for another minute until everything is evenly distributed and your kitchen smells like an Italian grandmother's house. This next part? Pure magic. Fold in the shredded mozzarella and grated Parmesan with a spatula, being careful not to overmix — you want those little cheese pockets throughout, not a homogenous blob that looks like disappointment.
- Now comes the fun part: adding the chopped sun-dried tomatoes and mixing just until they're distributed throughout. These little ruby jewels add pops of intense tomato flavor and chewy texture that make each bite interesting. The mixture should look like a party invitation — colorful, inviting, and impossible to resist. Taste it now and adjust the seasoning if needed, but try not to eat half the batch before anyone else gets to try it (I'll be honest — I've failed at this step more times than I care to admit).
- Here's where the plastic wrap trick comes in: scrape the cheese mixture onto a large piece of plastic wrap and use the wrap to shape it into a rough ball. Twist the ends to create a tight seal, then roll it gently between your palms to create a smooth sphere. This is the moment of truth — your cheese ball should hold its shape but still feel soft and pliable. Refrigerate for at least 2 hours or up to 3 days to let the flavors meld and the ball firm up enough to hold its shape when sliced.
- While the cheese ball chills, make your bruschetta topping by combining the chopped cherry tomatoes, minced garlic, olive oil, balsamic vinegar, and a pinch of salt in a bowl. Let this mixture sit for 15-20 minutes — this is where the magic happens. The salt draws out some of the tomato juices, concentrating the flavor and creating this incredible tomato essence that will make your taste buds sing. Don't skip this step or you'll end up with a watery mess that slides off the cheese ball like it's trying to escape.
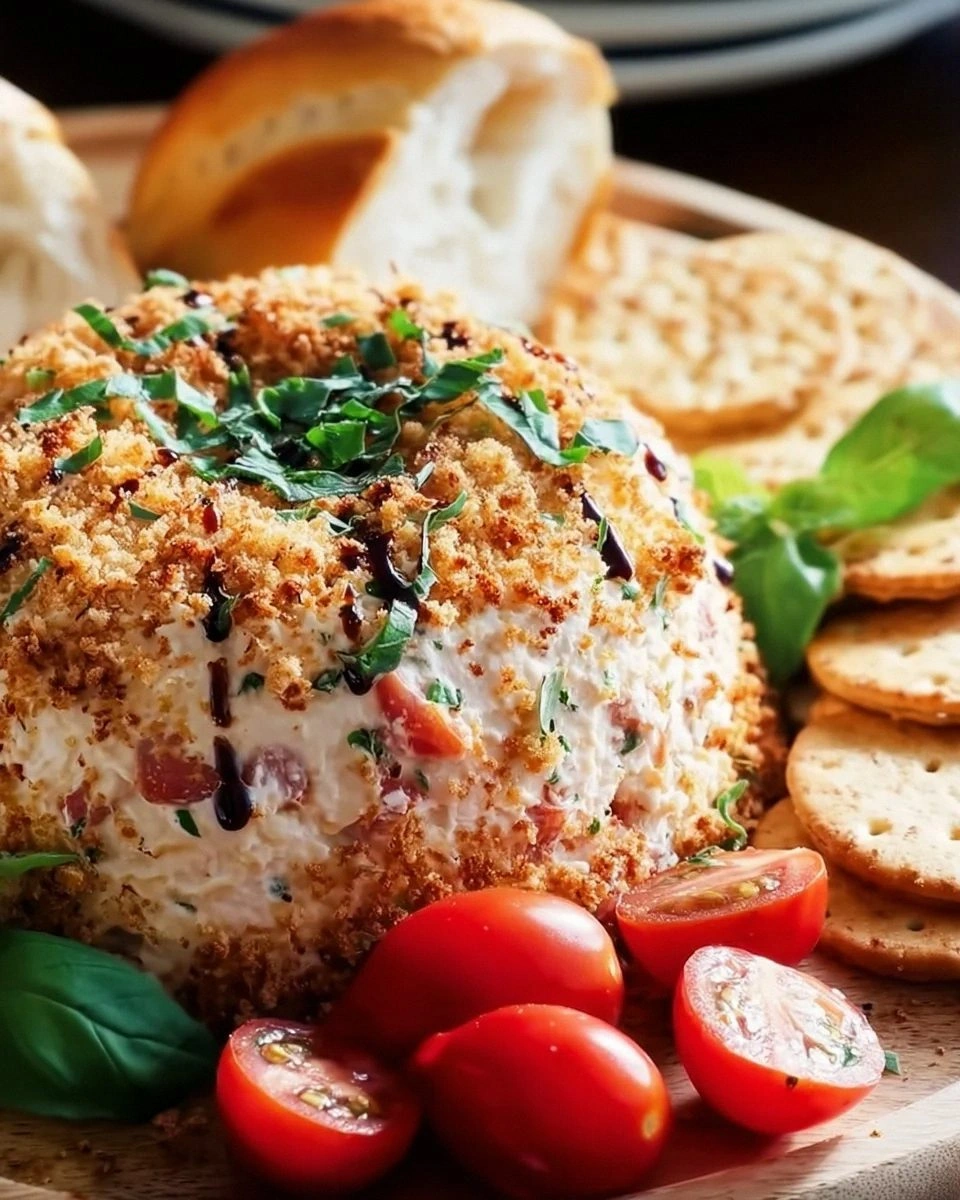
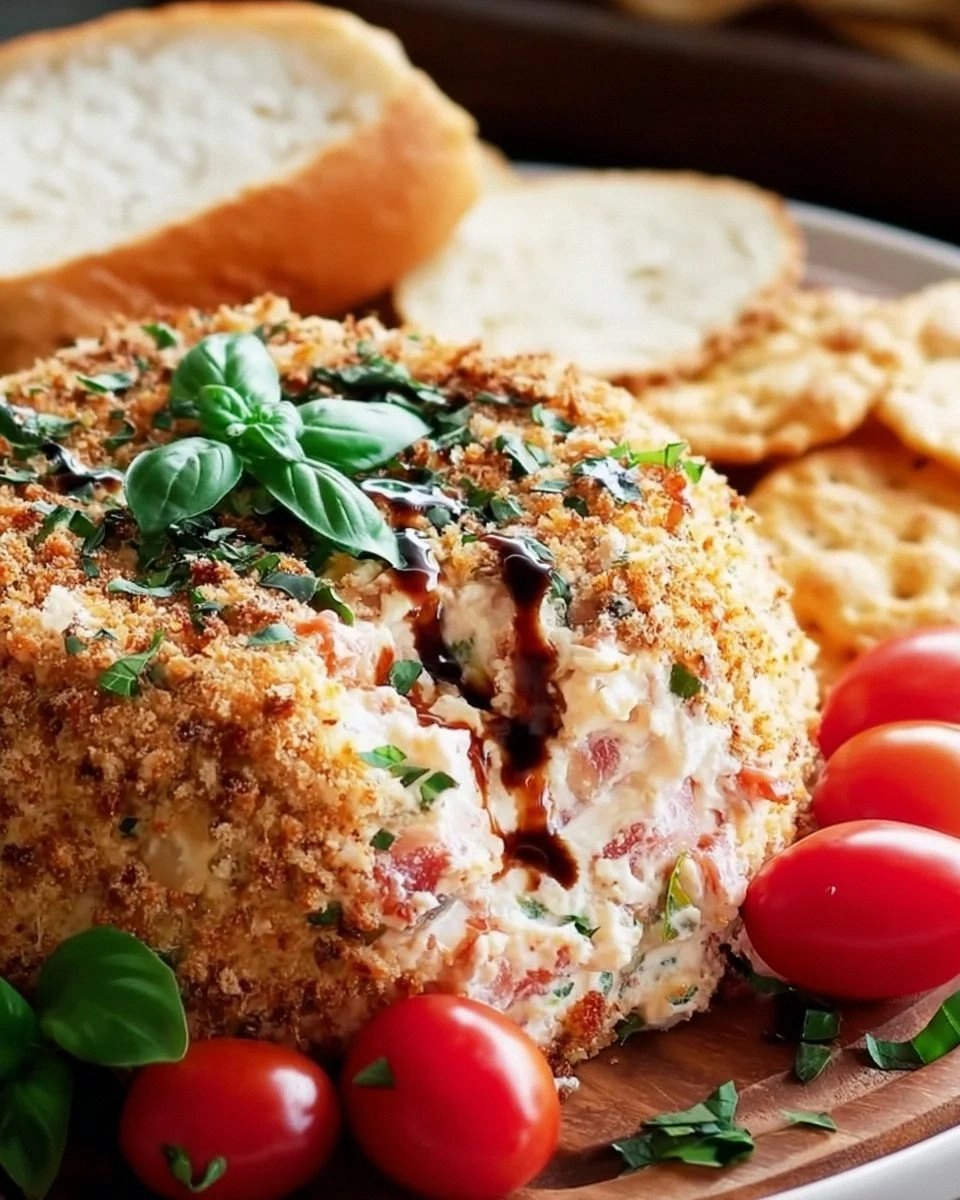
- Just before serving, unwrap your cheese ball and place it on your serving platter. Use the slotted spoon to add the bruschetta topping, letting the excess liquid drain back into the bowl. Top with the fresh basil ribbons and an extra drizzle of that sun-dried tomato oil if you're feeling fancy. The contrast between the white cheese ball and colorful topping should look like a summer garden exploded in the most beautiful way possible.
- Surround your masterpiece with an assortment of crackers, sliced baguette, or even vegetables if you're trying to pretend this is healthy. That sizzle when the cracker hits the cheese ball? Absolute perfection. Serve immediately and watch as your guests transform into cheese ball zombies, mechanically reaching for more until suddenly it's gone and everyone's looking around wondering where it went. Don't walk away from the table here — you might miss the best part.
- That's it — you did it. But hold on, I've got a few more tricks that'll take this to another level...
Insider Tricks for Flawless Results
The Temperature Rule Nobody Follows
Room temperature is your best friend when it comes to cheese balls, but especially this one. I'm talking about letting everything — the cream cheese, the goat cheese, even the serving platter if you're really committed — come to room temperature before serving. Cold cheese ball is like trying to spread concrete on your crackers, and nobody has time for that kind of workout at a party. The ideal serving temperature is around 68-70°F, where the cheese is soft enough to spread easily but still holds its shape. A friend tried serving this straight from the fridge once — let's just say it didn't end well, and she still gets teased about "the great cracker massacre of 2022."
Why Your Nose Knows Best
Your sense of smell is your secret weapon for knowing when this cheese ball is perfectly seasoned and ready to serve. Before you shape it into a ball, take a big whiff of the cheese mixture — it should smell like an Italian restaurant had a baby with a cheese shop. If you can't smell the garlic or herbs, add more. If the goat cheese smell is too strong, add a bit more cream cheese to mellow it out. This is where intuition meets experience, and trust me, your nose knows what it's doing. I've saved many a bland cheese ball by trusting my nose and adjusting before it was too late.
The 5-Minute Rest That Changes Everything
After you form your cheese ball and before you add the topping, let it sit at room temperature for exactly 5 minutes. This brief rest allows the surface to soften slightly so the bruschetta topping adheres better and doesn't slide off like it's trying to escape. It's like the cheese ball is getting mentally prepared for its big moment in the spotlight. Those five minutes also give you time to finish chopping the basil, arrange your crackers, and maybe sneak a taste of the bruschetta topping to make sure it's perfect. Future pacing: Picture yourself in five minutes, watching your guests' eyes light up when they taste this masterpiece.
The Cracker Compatibility Test
Not all crackers are created equal when it comes to cheese ball spreading, and this is where many people go wrong. You need a cracker that's sturdy enough to handle a generous spread of cheese and topping without snapping like a twig, but not so thick that it overwhelms the delicate flavors. Water crackers, thin baguette slices, and those little mini toasts work perfectly. Avoid anything with strong flavors that compete with the cheese ball — this isn't the time for your everything bagel crackers or spicy nacho chips. Test one before your guests arrive so you're not stuck with crackers that break and leave people fishing cheese ball out of the bowl with their fingers (though honestly, that might not be the worst thing).
Creative Twists and Variations
This recipe is a playground. Here are some of my favorite ways to switch things up:
The Mediterranean Makeover
Swap the Italian seasoning for Greek seasoning, add some chopped kalamata olives and crumbled feta to the cheese mixture, and top with a mixture of chopped cucumbers, tomatoes, red onion, and a sprinkle of oregano. Drizzle with good olive oil and serve with pita chips. It's like a Greek salad and a cheese ball had a beautiful baby that will transport you straight to Santorini, minus the expensive plane ticket.
The Spicy Southwest Version
Replace the goat cheese with pepper jack, add some diced green chiles and cumin to the cheese mixture, and top with a fresh pico de gallo instead of bruschetta. Serve with tortilla chips and watch as people discover that cheese balls can have a wild side. This version disappears faster than free drinks at an open bar, especially if you have a crowd that likes their appetizers with a little attitude.
The Fancy French Edition
Use herbed goat cheese and cream cheese, add some finely chopped cornichons and fresh herbs, and roll the entire ball in chopped fresh herbs instead of adding a wet topping. Serve with sliced baguette and call it a "fromage ball" — suddenly it's sophisticated enough for your wine club meeting, and nobody needs to know it's basically the same recipe with a fancy accent.
The Everything Bagel Explosion
Add everything bagel seasoning to the cheese mixture and roll the entire ball in more seasoning instead of adding the bruschetta topping. Serve with bagel chips and tell people it's breakfast-appropriate — because honestly, who doesn't want cheese ball for breakfast? This version is particularly dangerous because it seems perfectly reasonable to eat at 9 AM, and suddenly you're the person who brought cheese ball to brunch.
The Sweet and Savory Surprise
Make the base with cream cheese and a touch of honey, add some crispy bacon bits, and top with a mixture of fig jam and chopped toasted pecans. It sounds weird until you taste it, and then suddenly you're that person who brought the sophisticated cheese ball that has people questioning everything they thought they knew about appetizers. This version pairs beautifully with wine and people who like to pretend they're fancier than they actually are.
Storing and Bringing It Back to Life
Fridge Storage
The beauty of this bruschetta cheese ball is that it actually gets better with a little time in the fridge, as long as you store it properly. Wrap the cheese ball tightly in plastic wrap, then pop it into an airtight container — this double protection prevents it from absorbing any weird fridge odors and keeps it tasting fresh for up to 5 days. The bruschetta topping should be stored separately in its own container, where it'll keep for about 3 days before the tomatoes start getting sad and mushy. If you've already assembled the whole thing with the topping, plan to eat it within 24 hours for optimal freshness and texture. Add a tiny splash of water to the topping before storing — it steams back to perfection and prevents the tomatoes from drying out.
Freezer Friendly
Here's some excellent news: the cheese ball itself freezes beautifully for up to 2 months, making it the ultimate make-ahead party trick. Wrap it in plastic wrap, then aluminum foil, and label it with the date so you're not playing "mystery cheese ball" months later. Thaw it overnight in the refrigerator, then let it come to room temperature before serving. However, and this is crucial — do not freeze the bruschetta topping unless you enjoy the texture of frozen tomato mush. Make that fresh when you're ready to serve, or better yet, make a double batch of the cheese ball and freeze half for your future self who will thank you when unexpected guests show up.
Best Reheating Method
Okay, technically there's no "reheating" involved since this is served cold, but we need to talk about bringing it back to that perfect serving temperature. Take the cheese ball out of the fridge about 30-45 minutes before serving, depending on your room temperature. If you forgot and it's still fridge-cold when guests arrive, you can speed up the process by cutting it in half — the increased surface area helps it soften faster. For the topping, if it's been sitting and looks a little tired, refresh it with a splash of olive oil and a pinch of salt, or just make a fresh batch since it takes all of five minutes. The goal is that perfect spreading consistency where it's soft enough to glide onto crackers but still holds its shape like a proud, delicious sphere of cheesy glory.