I was standing in my kitchen, staring at a pot of bland chicken broth that tasted like it had been filtered through a sponge. I had promised my roommate a “ramen night” after a marathon of work, and the only thing louder than the ticking clock was the growl of my stomach. I dared myself to turn that sad broth into something that would make even a seasoned sushi chef nod in approval. The moment I tossed a spoonful of miso into the simmering liquid, the kitchen filled with a scent that was part earthy, part umami, and wholly unforgettable. This is hands down the best version you'll ever make at home, and I’m about to spill every secret.
Picture this: steam rising like a lazy dragon, the clatter of a wok, the sizzle of panko hitting hot oil, and the gentle pop of a soft‑boiled egg cracking open. You can hear the faint hiss of sesame oil as it kisses the broth, feel the warm weight of the bowl in your hands, and taste the deep, savory kiss of miso mingling with chicken. Most recipes get this completely wrong, either drowning the broth in soy or skipping the crunchy chicken katsu that makes the dish sing. I’ll be honest — I ate half the batch before anyone else got to try it, and that’s because every bite is a layered masterpiece.
What really sets this rendition apart is a tiny trick: I finish the broth with a splash of toasted sesame oil right at the end, which gives the soup a glossy sheen and a flavor that coats the noodles like velvet. Most people forget the importance of the “final flourish,” and that’s where they lose the magic. I dare you to taste this and not go back for seconds, because the combination of silky miso broth, crunchy chicken katsu, and that perfectly soft‑boiled egg is a culinary high‑five you won’t want to miss. Okay, ready for the game‑changer? Let me walk you through every single step — by the end, you’ll wonder how you ever made it any other way.
Before we dive in, a quick confession: I once tried a shortcut by using instant ramen noodles and pre‑made chicken nuggets, and the result was a soggy disappointment that could have been served as a cautionary tale. Most shortcuts strip away the texture and depth that make ramen an experience, not just a meal. This version respects the tradition while adding a modern twist that keeps things exciting. So grab your apron, fire up the stove, and let’s embark on a flavor adventure that will have your friends begging for the recipe. Stay with me here — this is worth it.
What Makes This Version Stand Out
- Umami Punch: The miso paste is blended with chicken broth and a dash of soy, creating a depth that rivals a five‑star ramen shop. It’s not just salty; it’s a rich, fermented hug for your palate.
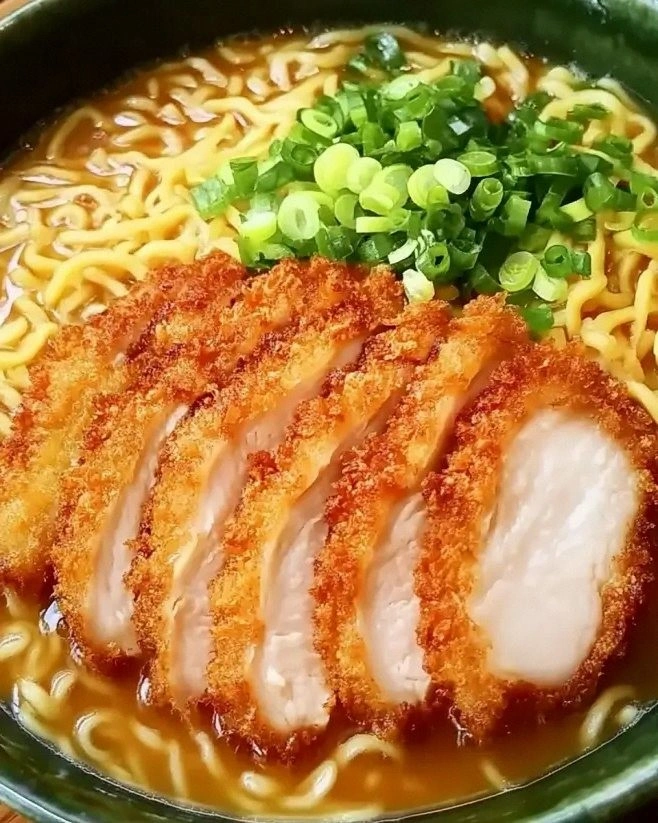
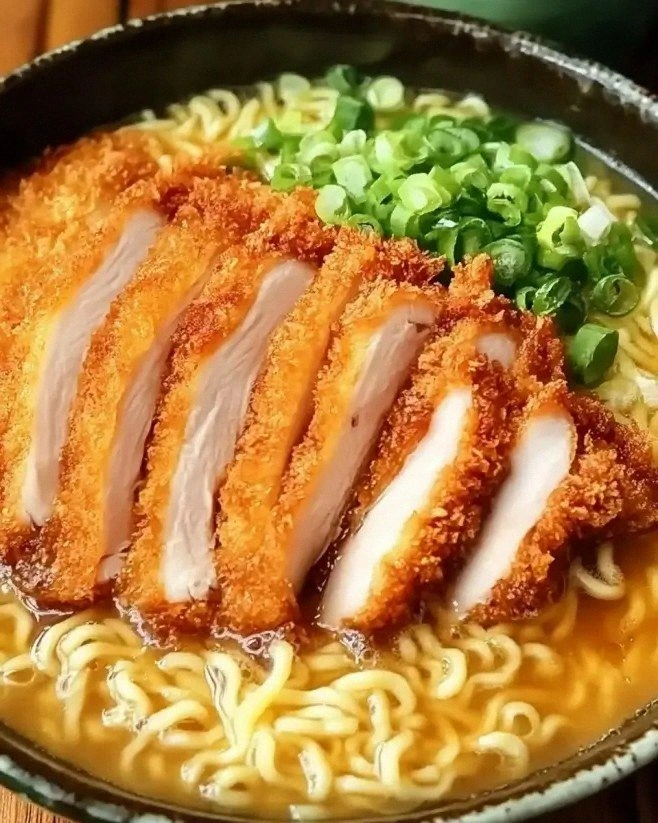
- Crispy Katsu: The chicken is coated in panko and a light flour dusting, then fried to a golden crisp that shatters like thin ice when you bite into it.
- Silky Noodles: Ramen noodles are cooked just until al dente, preserving that springy bite that soaks up broth without turning mushy.
- Balanced Heat: A whisper of ginger and garlic adds a subtle warmth that never overwhelms, letting the miso shine.
- Visual Appeal: The final garnish of green onions, nori, and a soft‑boiled egg turns the bowl into a work of art that’s Instagram‑ready.
- Easy Prep: All components can be prepped ahead of time, making it perfect for a weeknight dinner or a weekend feast.
- Family‑Friendly: Even picky eaters love the crunchy chicken and mild broth, making it a crowd‑pleaser every time.
- Make‑Ahead Potential: The broth keeps for days, and the katsu can be reheated to maintain its crunch, so leftovers are just as glorious.
Inside the Ingredient List
The Flavor Base
Miso paste is the heart of this broth, delivering that deep, fermented richness you crave in a bowl of ramen. Pair it with chicken broth and water to create a balanced canvas where the soy sauce adds a subtle salty edge. If you skip the miso, you’ll end up with a bland soup that feels like watered‑down chicken stock. For a sweeter twist, try white miso instead of the darker variety, but remember it will tone down the depth.
The Texture Crew
Panko breadcrumbs are the secret behind the chicken katsu’s satisfying crunch. Their airy structure ensures the coating stays light and doesn’t become greasy. If you don’t have panko, you can pulse regular breadcrumbs for a few seconds, but the texture won’t be as airy. The all‑purpose flour creates a thin veil that helps the egg adhere and gives the crust a golden hue.
The Unexpected Star
Sesame oil might seem like a garnish, but a splash at the end of cooking adds a nutty perfume that lifts the entire bowl. It’s the difference between “good” and “jaw‑dropping.” A common mistake is to add it too early, which burns the oil and creates a bitter note. Keep it on standby and drizzle just before serving for that final sparkle.
The Final Flourish
Green onions and nori sheets bring bright, briny notes that cut through the richness of the broth. Slice the onions thinly so they retain a slight crunch, and tear the nori into bite‑size strips for a sea‑like texture. If you can’t find nori, a sprinkle of toasted sesame seeds works in a pinch, though you’ll miss the oceanic aroma. Always add the green onions just before serving to keep their color vibrant.
Everything's prepped? Good. Let's get into the real action...
The Method — Step by Step
Start by heating a large pot over medium heat and adding the sesame oil. As soon as it shimmers, toss in the grated ginger and minced garlic, stirring until you hear a gentle sizzle that signals the aromatics are waking up. Let them cook for about 30 seconds, just until fragrant, but don’t let them brown – a burnt note will ruin the broth’s delicate balance. This is the moment of truth for the flavor base, and you’ll know it’s right when the kitchen smells like a street market in Osaka.
Next, pour in the chicken broth and water, then bring the mixture to a gentle boil. Once bubbling, whisk in the miso paste, soy sauce, and a splash of the remaining sesame oil. The broth should turn a deep amber, and you’ll notice the surface forming tiny bubbles that look like a calm sea. Reduce the heat to a low simmer and let it gently bubble for 10 minutes, allowing the flavors to meld. Watch Out: Adding miso to a rolling boil can kill its beneficial microbes and flatten its flavor, so keep the heat gentle.
While the broth simmers, prepare the chicken katsu. Pat the cooked chicken dry, then set up a three‑step coating station: flour in one bowl, a lightly beaten large egg in the second, and panko breadcrumbs in the third. Dredge each piece first in flour, shaking off excess, then dip in egg, and finally press into panko until fully coated. The flour creates a dry surface for the egg to cling to, while the panko gives that airy crunch we all love.
Heat a generous splash of vegetable oil in a deep skillet over medium‑high heat. When the oil shimmers, carefully lay the coated chicken pieces in the pan. You’ll hear a satisfying sizzle as the panko starts to brown. Fry each side for about 3‑4 minutes, turning only once, until the crust is golden and the interior is heated through. The edges will start pulling away, a clear sign that the coating is perfectly crisp.
While the katsu fries, bring a separate pot of water to a rolling boil for the ramen noodles. Add the noodles and cook according to package instructions, usually 3‑4 minutes, until they’re just al dente. Drain them in a colander and rinse briefly under cold water to stop the cooking process. This prevents the noodles from absorbing too much broth later, keeping the bowl balanced.
Now, assemble the bowl. Place a generous handful of cooked ramen noodles at the bottom, then ladle the hot miso broth over them, ensuring each noodle is fully submerged. Slice the chicken katsu into strips and arrange them on top of the noodles, letting the crispy edges peek out. Halve the soft‑boiled egg and nestle it beside the chicken, its golden yolk ready to melt into the broth.
Finish with a drizzle of sesame oil, a scattering of thinly sliced green onions, and a few torn nori sheets. The final garnish adds a pop of color and a hint of briny seaweed that elevates the dish to restaurant quality. Give the bowl a gentle stir so the oil glistens, then dive in while it’s still steaming hot. That first slurp? Pure bliss.
That’s it — you did it. But hold on, I've got a few more tricks that'll take this to another level. For instance, a quick dash of chili oil can add a whisper of heat without overpowering the miso, and a sprinkle of toasted sesame seeds adds an extra layer of nuttiness. Keep these ideas in mind for your next round, and you’ll keep impressing friends and family alike.
Insider Tricks for Flawless Results
The Temperature Rule Nobody Follows
Never let the broth boil violently after adding miso; a gentle simmer preserves the delicate flavors and keeps the broth clear. I once let it roar, and the result was a cloudy, bitter mess that tasted like burnt toast. Keep the heat low and watch for tiny bubbles dancing on the surface. This subtle control makes the difference between a restaurant‑grade broth and a kitchen mishap.
Why Your Nose Knows Best
Your sense of smell is the ultimate timer. When the ginger and garlic become aromatic, you’ll know they’re ready for the broth. If you can’t smell anything after 30 seconds, the pan is too cool; crank the heat up a notch. Trusting your nose prevents under‑cooking and guarantees that each layer of flavor is fully awakened.
The 5‑Minute Rest That Changes Everything
After frying the chicken katsu, let it rest for exactly five minutes before slicing. This short pause lets the juices redistribute, keeping the meat moist while the crust stays crisp. A friend tried to cut it immediately and ended up with soggy crumbs clinging to the chicken. Patience here is a tiny investment for a massive payoff in texture.
Noodle Timing Mastery
Ramen noodles are fickle; overcook them and they become gummy, undercook and they’re chewy. The secret is to pull them out a minute before they’re fully done, then let them finish cooking in the hot broth. This technique ensures the noodles stay springy and absorb just enough flavor without turning mushy.
Egg Perfection Protocol
For the soft‑boiled egg, start timing the moment the water returns to a boil after adding the egg. Exactly six minutes yields a jammy yolk that melts into the broth like liquid gold. If you go beyond seven minutes, the yolk hardens and you lose that luxurious silkiness. I once overcooked an egg and the whole bowl felt flat – never again.
Creative Twists and Variations
This recipe is a playground. Here are some of my favorite ways to switch things up:
Spicy Miso Inferno
Add a teaspoon of gochujang or a drizzle of chili oil to the broth for a fiery kick. The heat pairs beautifully with the earthy miso, creating a balanced heat that awakens the palate without overwhelming it. Perfect for those who love a little burn.
Veggie‑Heavy Delight
Swap the chicken for crispy tofu cubes, and toss in sliced shiitake mushrooms, bok choy, and baby corn. The tofu absorbs the broth like a sponge, while the vegetables add fresh crunch and color. This variation is ideal for a vegetarian crowd.
Coconut Miso Fusion
Replace half of the water with coconut milk for a creamy, slightly sweet undertone. The coconut balances the salty miso, turning the bowl into a tropical‑Japanese hybrid that’s perfect for summer evenings.
Sesame‑Crusted Salmon
Instead of chicken katsu, coat a salmon fillet in sesame seeds and pan‑sear it until the crust is crisp. The oily fish adds richness, and the sesame seeds echo the broth’s nutty notes. A sophisticated twist that feels upscale.
Umami‑Boosted Beef
Thinly slice ribeye, marinate in a splash of soy and mirin, then quickly sear. The beef adds a deep, meaty flavor that pairs well with the miso base, turning the dish into a hearty, comforting bowl.
Storing and Bringing It Back to Life
Fridge Storage
Keep the broth in an airtight container for up to 4 days. Store cooked noodles and katsu separately to preserve texture; reheat the broth on the stove, then toss in the noodles for a minute before serving.
Freezer Friendly
The broth freezes beautifully for up to 2 months. Portion it into freezer‑safe bags, label, and defrost in the refrigerator overnight. Freeze the katsu on a parchment sheet before bagging to keep the coating from sticking together.
Best Reheating Method
When reheating, add a splash of water or extra broth to the pot; this steams the noodles back to perfection and prevents them from drying out. Heat the katsu in a hot skillet for 2 minutes per side to revive its crunch. The result is as close to fresh as possible.