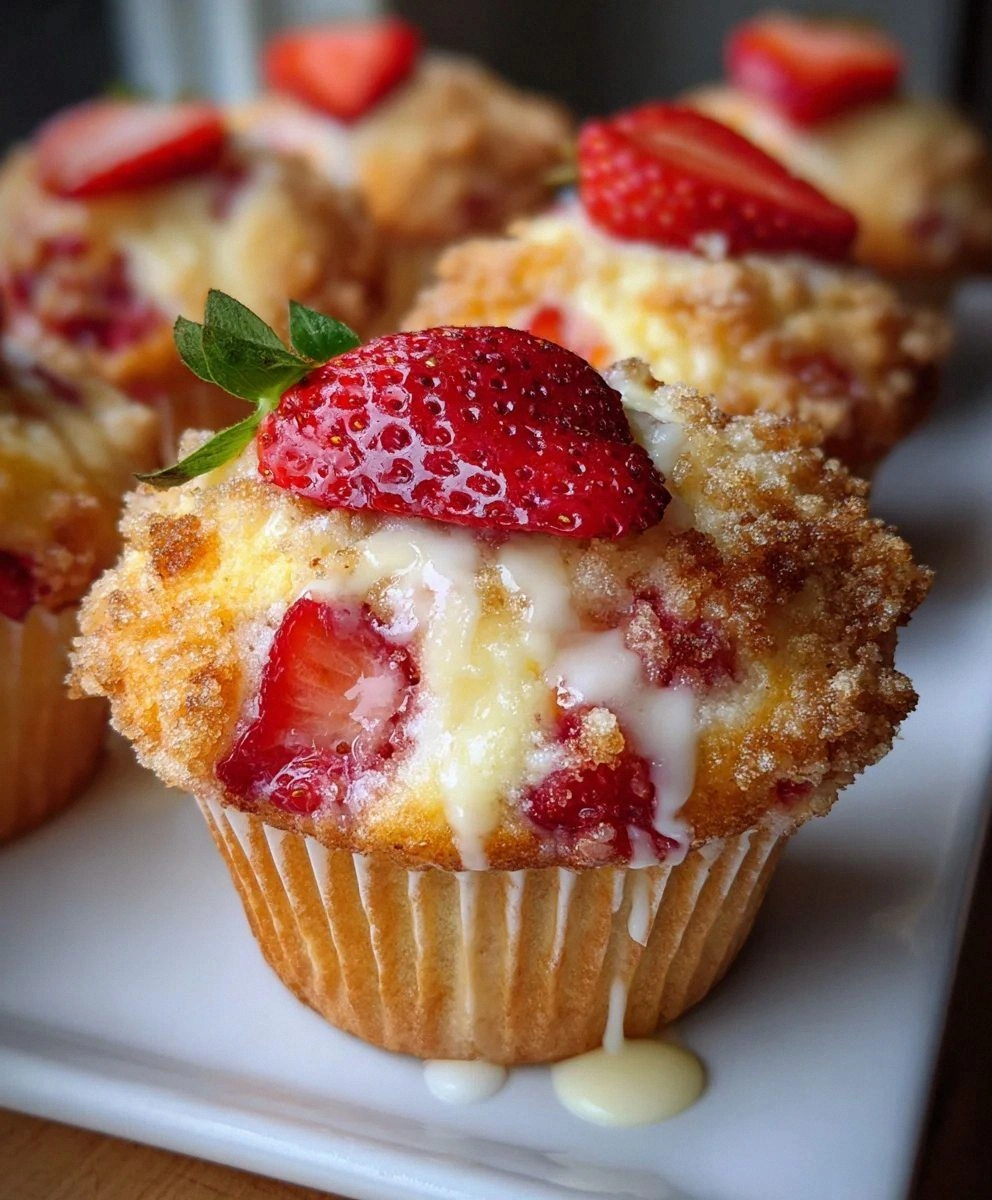
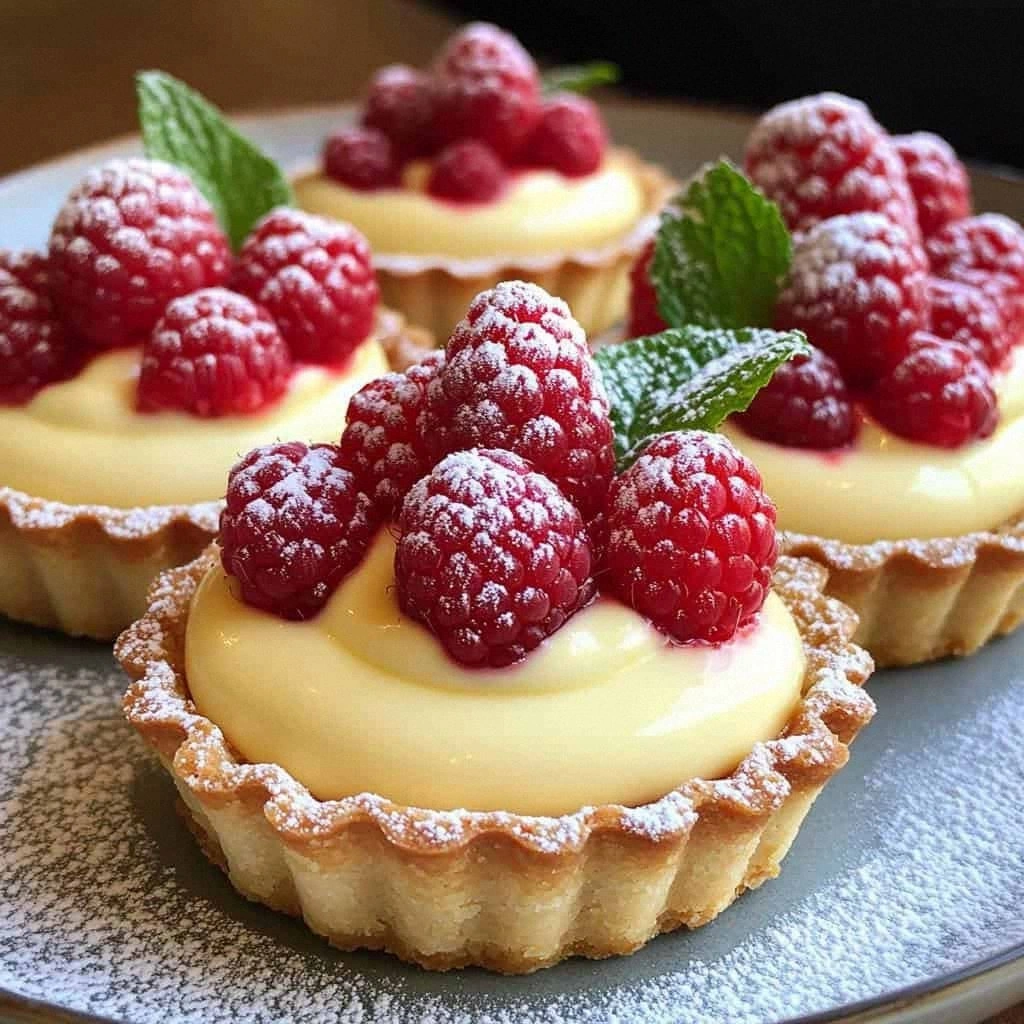
I still remember the first time I tried to impress my future mother-in-law with dessert. Armed with nothing but a flimsy hand mixer and the kind of overconfidence that only a twenty-something with a Pinterest board can possess, I attempted a towering raspberry pavlova. The result looked like a crime scene: sticky pink goo sliding off a collapsed meringue mountain, raspberries rolling across her pristine counter like tiny escapees. She took one polite bite, smiled through her teeth, and quietly suggested we pick up ice cream on the way home. That night, I swore I'd master a raspberry dessert so foolproof, so ridiculously good, that even my harshest critic (hi, mom-in-law) would beg for the recipe. Fast-forward five years and dozens of trials later: these vanilla cream raspberry tarts are my redemption arc in edible form.
The magic starts the moment you split that vanilla bean and the caviar-like flecks hit warm cream—suddenly your kitchen smells like a Parisian patisserie where angels bake. But here's the twist that changed everything: instead of folding raspberries into the filling and watching them bleed into sad purple streaks, I keep them plump and rebellious on top, glazed just enough to sparkle like rubies. One bite and you get the shatter of buttery pastry, the silk of real vanilla custard, and the bright pop of fresh raspberry that makes your tongue do a little happy dance. I dare you to taste this and not go back for seconds; I personally ate three in one sitting while "testing" the recipe last week, and I'm not even sorry.
Most recipes get this completely wrong. They over-complicate the pastry, under-flavor the cream, or drown the berries in gelatinous goo that tastes like regret. This version? It's the little black dress of desserts: simple, stunning, and impossible to mess up once you know the secrets. Picture yourself pulling these out of the oven, the whole kitchen smelling like melted ice cream and summer, your friends hovering with forks before you've even dusted them with sugar. Stay with me here—this is worth it.
What I'm sharing today isn't just another pretty tart. It's the dessert that turned my mother-in-law into my biggest fan (she now requests these for every family gathering), the one that my neighbor trades for fresh herbs from her garden, the one that makes my kids think I'm some kind of wizard. Let me walk you through every single step—by the end, you'll wonder how you ever made it any other way.
What Makes This Version Stand Out
Buttery-Flaky Hybrid Crust: We're talking a cross between shortbread and puff pastry—tender enough to shatter under your fork, sturdy enough to hold a mountain of cream without going soggy. The secret? Freezing the butter cubes solid and pulsing them in the food processor until they're the size of peas. Most recipes tell you to stop at "coarse crumbs," but that leaves you with a mealy, cookie-like base. You want visible butter pockets that steam in the oven and create micro-layers of flakiness.
Vanilla Bean Explosion: Real vanilla bean, not extract, steeped in cream until every molecule tastes like a vanilla milkshake. I scrape every last fleck from the pod, then toss the empty bean into my sugar jar for vanilla-scented sweetness later. Some people balk at the cost, but here's the math: one bean flavors an entire pot of custard and perfumes your sugar for weeks, making it the best 89 cents you'll ever spend.
No-Bake Custard Method: Instead of baking the custard in the oven (dry edges, curdled texture, sad face), we cook it stovetop until it coats a spoon like liquid velvet, then chill it fast over an ice bath. This keeps the yolks silky and the vanilla bright, not muted by oven heat.
Berry-on-Top Brilliance: Raspberries stay fresh and perky because we glaze them with barely warmed jam—no watery puddles, no bleeding color, just glossy fruit that looks like it was picked by woodland fairies. The contrast between tart berry and sweet cream makes your taste buds sit up and pay attention.
Make-Ahead Magic: Pastry shells keep crisp for three days in an airtight tin, custard holds for four days refrigerated, berries can be glazed morning-of. Assemble in five minutes and watch everyone think you slaved all day. I once made these for a dinner party while simultaneously helping my kid with homework and folding laundry—multitasking level unlocked.
Crowd Reaction Guarantee: I've served these to chocolate addicts who claimed fruit desserts were "pointless," to gluten-free friends who begged for a wheat-full exception, to toddlers who usually only eat beige foods. Universally, plates come back scraped clean, often with requests for the recipe written in haste on whatever scrap of paper is handy.
Alright, let's break down exactly what goes into this masterpiece...
Inside the Ingredient List
The Flavor Base
All-purpose flour is your canvas—315 grams of it, measured by spooning it into the cup and leveling like you're performing surgery. Too much flour and your crust turns into edible cardboard; too little and it slumps like a disappointed parent. Cold unsalted butter is non-negotiable: salt in butter can vary wildly, and you want complete control over seasoning. Cut it into half-inch cubes, then pop them in the freezer while you measure everything else. When these little butter rocks hit hot oven air, they create steam pockets that translate to shattering layers in your mouth.
Granulated sugar does double duty here: it sweetens the crust just enough to make it dessert-worthy, but more importantly, it interferes with gluten development, keeping things tender. Salt is the invisible hero—just a quarter teaspoon wakes up every other flavor without making anything taste salty. Skip it and the whole dessert falls flat like a joke without a punchline.
The Texture Crew
The egg in the pastry isn't just binding things together; it's creating richness and helping the crust brown to a deep golden that looks like sunshine captured in carbohydrate form. Ice water, and I mean actually icy with cubes floating in it, keeps the butter cold while bringing the dough together. Too warm and you get a greasy mess that bakes up tough and shrunken. The vinegar trick—just a splash—relaxes gluten strands, but don't worry, you won't taste it. Think of it as yoga for your dough.
The Unexpected Star
Heavy cream and whole milk join forces for the custard: cream gives body and richness, milk keeps things from feeling like you're eating butter straight. The ratio is crucial—too much cream and it's like eating vanilla-flavored whipped wax, too much milk and it won't set properly. Four egg yolks provide the velvety texture and that gorgeous yellow that screams "real vanilla custard." Cornstarch is your insurance policy against weeping or curdling, but add it off heat or you'll get scrambled eggs.
Here's where I get evangelical: buy a real vanilla bean. Not the dried-up shriveled one from the grocery store that's been sitting there since 2019. Find a plump, glossy bean that bends without snapping, filled with those gorgeous caviar-like seeds. When you split it lengthwise and scrape it with the back of a knife, the aroma should make you want to dab it behind your ears. This is the difference between "nice" and "holy cow, what is this magic?"
The Final Flourish
Fresh raspberries should be plump, dry, and smell like summer even when it's raining outside. Avoid the clamshells with juice at the bottom—those berries are already mourning their lost potential. A pint looks like plenty until you start eating them while cooking, so buy two if you're feeding a crowd or have zero willpower. The optional raspberry jam glaze isn't just for beauty; it creates a sticky surface that keeps the berries from drying out and adds a concentrated berry punch. Warm it just enough to loosen, then strain out seeds for a glassy finish.
Everything's prepped? Good. Let's get into the real action...
The Method — Step by Step
- Make the pastry first because it needs to chill. In a food processor, pulse flour, sugar, and salt to combine. Add the frozen butter cubes and pulse until you have pieces ranging from pea-size to lima bean-size—this variation creates flakiness. Whisk the egg with ice water and vinegar, then drizzle through the feed tube while pulsing. Stop the second the dough starts clumping; it should look like crumbly feta cheese, not a smooth ball. Dump it onto plastic wrap, press into a flat rectangle (this makes rolling easier later), and refrigerate for at least an hour. The dough should feel like a cold, firm handshake.
- While the dough chills, start the custard because it needs to cool completely. In a medium saucepan, combine cream, milk, half the sugar, salt, and the scraped vanilla bean plus pod. Heat over medium until steaming and tiny bubbles appear around the edge—do not boil or you'll scramble the yolks later. Your kitchen should smell like an ice cream factory at this point; resist the urge to drink it straight.
- In a bowl, whisk yolks, remaining sugar, and cornstarch until pale and thick. This step dissolves the sugar and coats the starch particles so they don't clump. Slowly ladle in the hot cream mixture while whisking constantly—this tempers the yolks so they don't turn into scrambled eggs. Pour everything back into the saucepan and cook over medium heat, whisking constantly, until it thickens enough to coat the back of a spoon. When you draw your finger through, it should leave a clear trail that doesn't immediately fill in. Remove from heat, whisk in butter until melted and glossy.
- Strain the custard through a fine-mesh sieve into a bowl set over an ice bath. This catches any accidental egg bits and cools it fast, preventing carryover cooking. Press plastic wrap directly onto the surface to prevent a skin from forming. Chill until completely cold, about two hours, or up to four days. The texture should be like thick yogurt that holds peaks when you dollop it.
- Roll out the dough on a floured surface, rotating it quarter-turns to prevent sticking and keep it even. You're aiming for 1/8-inch thickness—thin enough to be elegant, thick enough to hold filling. If it cracks, just press it back together; cold dough is forgiving. Cut out rounds slightly larger than your tart pans, press gently into the edges, and trim the tops with a rolling pin for a clean edge. Prick the bases with a fork to prevent puffing.
- Blind bake the shells at 375°F for 20 minutes with parchment and pie weights, then remove weights and bake another 5-7 minutes until golden. The edges should be browned like toasted almonds, the bottom should look dry and slightly sandy. Cool completely in the pans on a rack. If your kitchen smells like buttery heaven, you've done it right.
- Assemble just before serving for maximum contrast. Whisk the chilled custard to loosen it slightly, then spoon into shells and smooth the tops. Arrange raspberries in concentric circles or just pile them on rustic-style—both look gorgeous. Warm the jam with a splash of water until liquid, strain, then brush gently over berries for a mirror-like shine. Dust with powdered sugar if you're feeling fancy, though they're pretty spectacular naked.
- Take a moment to admire your handiwork—these look like they came from a boutique bakery where everything costs more than your car payment. Serve with coffee for afternoon tea vibes, or with champagne if you're celebrating. Either way, prepare for people to close their eyes on the first bite; it's that kind of good.
That's it—you did it. But hold on, I've got a few more tricks that'll take this to another level...
Insider Tricks for Flawless Results
The Temperature Rule Nobody Follows
Cold ingredients are everything. I mean everything. If your butter isn't borderline frozen, your pastry will slump like a tired soufflé. Same goes for the custard—if you pour hot filling into warm shells, you'll get weeping and soggy bottoms that would make Mary Berry cry. Chill the custard until it's thick enough to mound on a spoon, chill the shells until they're stone cold, then assemble. Your tarts will stay crisp for hours instead of minutes. A friend tried skipping this step once—let's just say it didn't end well, and we ate hers with spoons straight from the muffin tin.
Why Your Nose Knows Best
Don't trust the timer alone; trust your senses. The pastry is done when it smells like toasted butter and looks golden even in the center. The custard is ready when it goes from liquid to thick enough that you can see the trail of your whisk for a second. If you're unsure, err on the side of slightly underdone—both will continue cooking from residual heat. That sizzle when custard hits the ice bath? Absolute perfection, and your nose will know it before your eyes do.
The 5-Minute Rest That Changes Everything
After whisking the hot cream into the yolks, let the mixture rest for five minutes before returning it to the pot. This equalizes the temperature gently, reducing shock and preventing curdling. It's like letting steak come to room temperature before searing—an extra step that pays off in silky smooth custard. Use this time to wash a dish or dance to one song; multitasking at its finest.
The Berry Selection Secret
Buy raspberries the day you plan to serve if possible. Look for ones that are plump, dry, and uniformly colored—avoid any with white patches or juice stains in the container. If you must buy ahead, spread them on a paper towel-lined tray, refrigerate uncovered, and don't wash until just before using. Wet berries mold faster than you can say "disaster."
The Glaze That Makes Them Professional
Warming jam seems simple, but here's the pro move: add a teaspoon of water per quarter cup of jam, heat just until liquid, then strain while warm. This creates a clear, glossy glaze that clings without being sticky. Brush it on with a pastry brush held vertically, letting excess drip off. The berries will look like they're wearing tiny coats of shiny armor, and they'll stay fresh for hours under party lights.
Creative Twists and Variations
This recipe is a playground. Here are some of my favorite ways to switch things up:
Chocolate Raspberry Decadence
Swap out half the flour for Dutch-processed cocoa powder in the pastry for a chocolate crust that tastes like Oreo's sophisticated cousin. Fill with the vanilla custard as usual, then top with raspberries and a drizzle of warm Nutella thinned with cream. The chocolate-vanilla-raspberry combo is like a Neapolitan ice cream sandwich grew up and got classy.
Lemon Vanilla Sunshine
Add the zest of two lemons to the custard along with the vanilla for a bright, sherbet-like flavor that makes the berries taste even berry-er (yes, that's a word now). Top with candied lemon peel alongside the raspberries for a triple-threat citrus situation. This version is like summer in edible form, even in the dead of winter.
Salted Caramel Dream
Drizzle a spoonful of salted caramel in the bottom of each shell before adding custard. The salt amplifies the vanilla, the caramel adds buttery depth, and when you hit a raspberry, it's like a flavor explosion that makes people close their eyes involuntarily. Use store-bought caramel if you're short on time—just warm it slightly so it spreads easily.
Mixed Berry Medley
Use a mix of raspberries, blackberries, and blueberries for a patriotic vibe that tastes like Fourth of July fireworks. The different berries bring varying levels of sweet and tart, creating a more complex flavor profile. Kids love the rainbow effect, and adults appreciate the sophisticated berry blend.
Mini Cheesecake Hybrid
Beat 4 oz cream cheese into the custard while it's warm for a subtle cheesecake vibe that sets up extra firm. Top with raspberries and a sprinkle of graham cracker crumbs for the full cheesecake experience without the water bath or cracking anxiety. These are dangerous—they disappear faster than free samples at Costco.
Almond Joy Remix
Add a teaspoon of almond extract to the custard and sprinkle toasted sliced almonds on top with the raspberries. The almond-raspberry pairing is classic European bakery vibes, and the nuts add crunch that plays beautifully against the smooth custard. Toast the almonds in a dry pan until they smell like marzipan; anything less and you're missing the magic.
Storing and Bringing It Back to Life
Fridge Storage
Assembled tarts keep beautifully for up to 24 hours in the fridge, uncovered on a plate so condensation doesn't make the shells soggy. After that, the pastry starts to soften from the moisture in the custard. If you need longer, store shells and custard separately, then assemble just before serving. The custard will keep four days refrigerated; press plastic wrap directly on the surface to prevent a skin.
Freezer Friendly
Baked pastry shells freeze like a dream. Cool completely, then stack with parchment between and wrap tightly. They'll keep for two months and thaw in about 30 minutes on the counter. The custard also freezes well—portion into silicone muffin cups, freeze solid, then pop out and store in bags. Thaw overnight in the fridge and whisk vigorously to restore the silky texture. Assembled tarts don't freeze well; the raspberries turn into sad mush upon thawing.
Best Reheating Method
These are best served cold or room temperature, but if your custard has been refrigerated and seems too firm, let it sit at room temperature for 15 minutes before serving. For pastry that's lost its crunch, refresh in a 325°F oven for 5-7 minutes until warm and crisp again. Add a tiny splash of water to the custard and whisk if it seems thick after storage—it steams back to perfection and tastes like you just made it.