I was halfway through a boring Tuesday when my roommate challenged me: “Make something that can turn a bland game night into a full‑blown flavor explosion, and I’ll buy the next round of pizza.” I laughed, grabbed the nearest chicken rotisserie, and stared at a pack of tiny slider buns that looked like they’d been designed for a miniature sandwich convention. The kitchen was humming, the fridge door squeaked, and a faint memory of a failed buffalo wing attempt from last year lingered like a ghost of burnt sauce. I thought, “What if I could take that wing sauce, marry it to melty cheese, and stuff it into a bite‑size bun that practically screams ‘eat me’?”
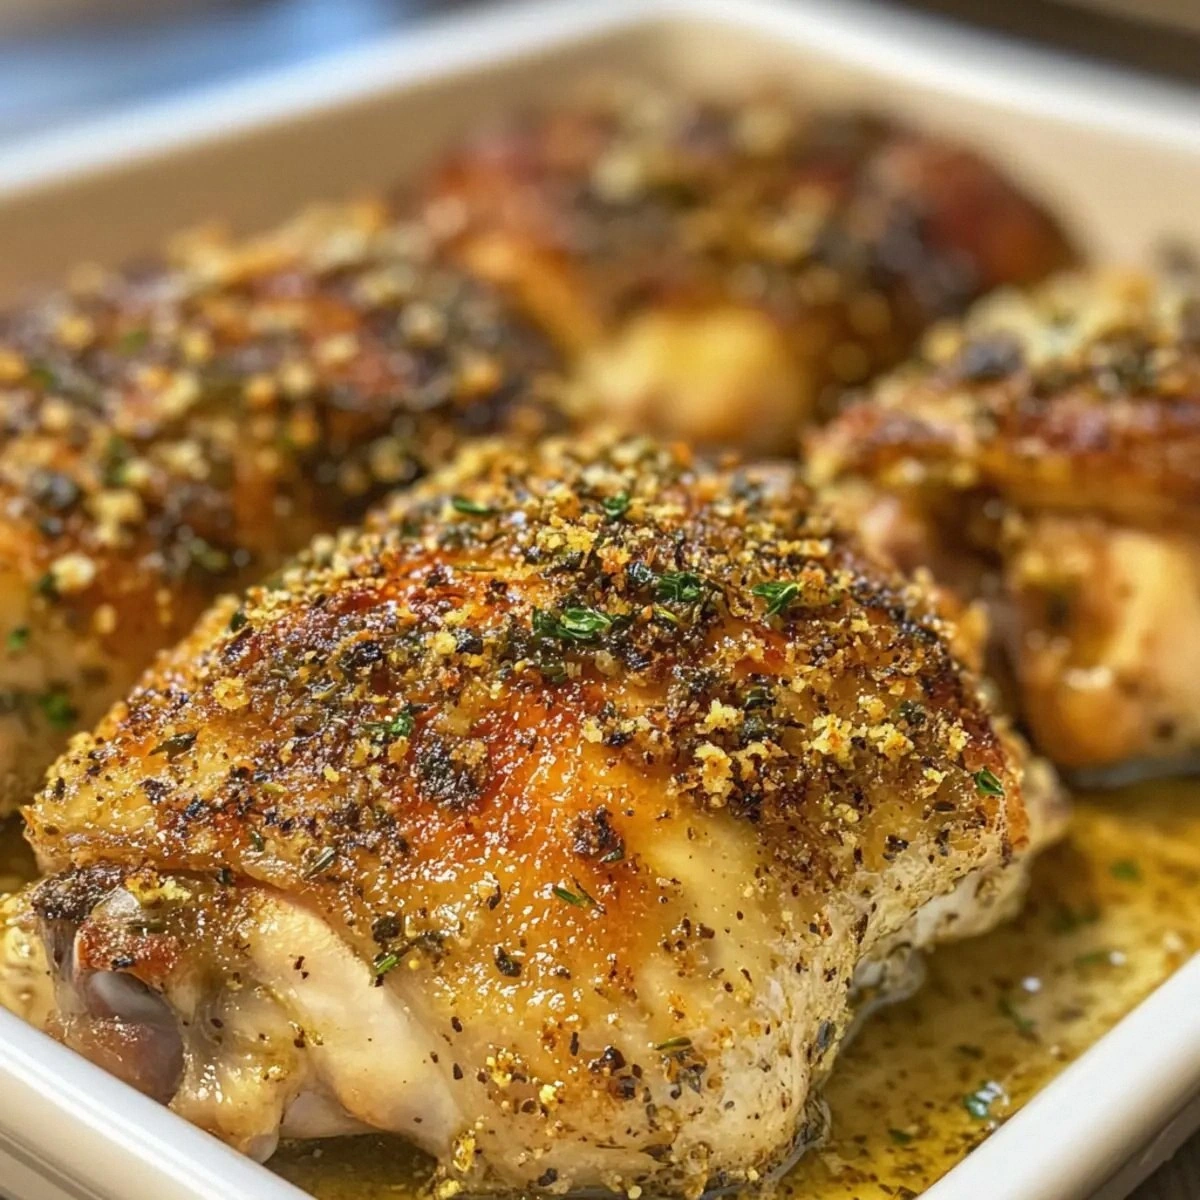
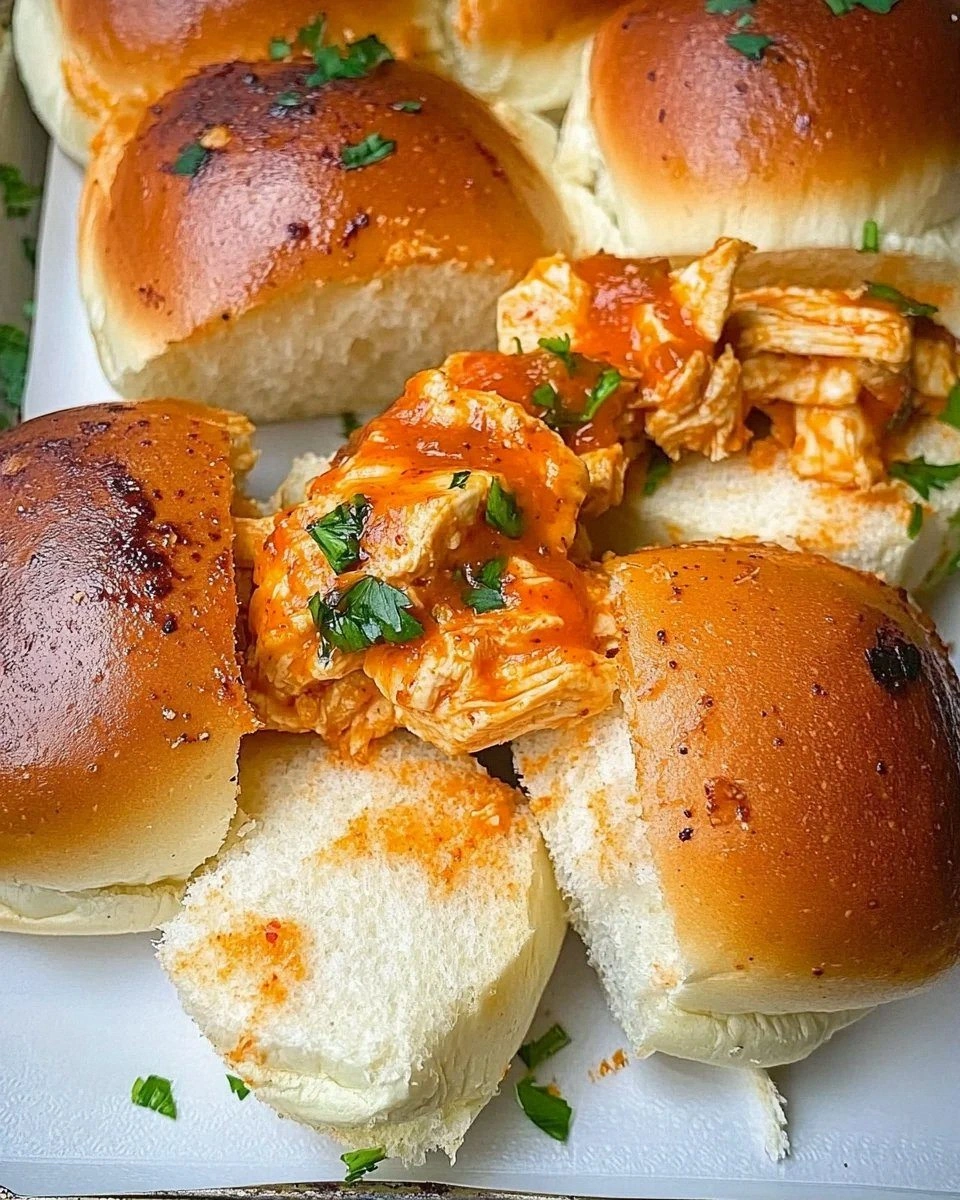
Fast forward two hours, and the whole apartment was drenched in the scent of sizzling butter, garlic, and a whisper of paprika that made my nose twitch in pure anticipation. The sauce clung to the shredded chicken like a velvet blanket, while the cheese bubbled and browned in the oven, forming those golden, stretchy ribbons you only see in foodie Instagram reels. The buns? They toasted just enough to get a crisp edge that shatters like thin ice when you bite into it, revealing a molten core that drips just enough to make you lick your fingers without feeling guilty. I dare you to taste this and not go back for seconds—seriously, I’ve tried, and I failed.
Most buffalo chicken slider recipes get this completely wrong: they either drown the meat in sauce, leaving a soggy mess, or they skimp on the cheese, making the whole thing feel like a bland bite. This version, however, balances heat, creaminess, and texture with the precision of a seasoned chef and the reckless joy of a kitchen daredevil. The secret? A quick butter‑garlic glaze that locks in moisture and adds a buttery crunch, plus a splash of ranch dressing that tames the heat just enough to keep you reaching for the next slider. I’ll be honest — I ate half the batch before anyone else got to try it, and that’s a confession worth sharing.
Okay, ready for the game‑changer? Let me walk you through every single step — by the end, you’ll wonder how you ever made it any other way. Picture yourself pulling these golden beauties out of the oven, the whole kitchen smelling like a sports bar on championship night, and the crowd around you chanting for another round. This next part? Pure magic.
What Makes This Version Stand Out
- Taste: The combination of Frank’s Buffalo sauce and ranch creates a sweet‑heat balance that dances on the palate without overwhelming it.
- Texture: A crisped bun exterior gives way to a buttery, melt‑in‑your‑mouth interior, while the cheese stretches like a lazy cat in sunshine.
- Simplicity: Fewer than fifteen ingredients and a single pan mean you can throw this together even on a weekday night.
- Uniqueness: The garlic‑butter glaze is the secret weapon that most recipes skip, adding depth and a subtle caramelized note.
- Crowd Reaction: Guests will line up, whisper “again?” and start a friendly debate about who gets the last slider.
- Ingredient Quality: Using real shredded chicken instead of pre‑cooked nuggets ensures juicy bites that hold the sauce.
- Make‑Ahead Potential: Assemble ahead, refrigerate, and bake just before serving for stress‑free party prep.
Inside the Ingredient List
The Flavor Base
Frank’s Buffalo hot sauce is the heart of this dish, delivering that classic wing heat that most people recognize instantly. It’s fermented, giving it a tangy backbone that cuts through the richness of the cheese. If you’re feeling adventurous, swap half the sauce for a smoky chipotle‑adobo for a deeper, smoky twist.
Ranch dressing isn’t just a cooling agent; it adds a creamy, herb‑laden undertone that softens the peppery edge of the buffalo sauce. Skipping it will leave the sliders feeling one‑dimensional, like a solo guitarist without a rhythm section. Look for a ranch with real buttermilk for that authentic tang.
The Texture Crew
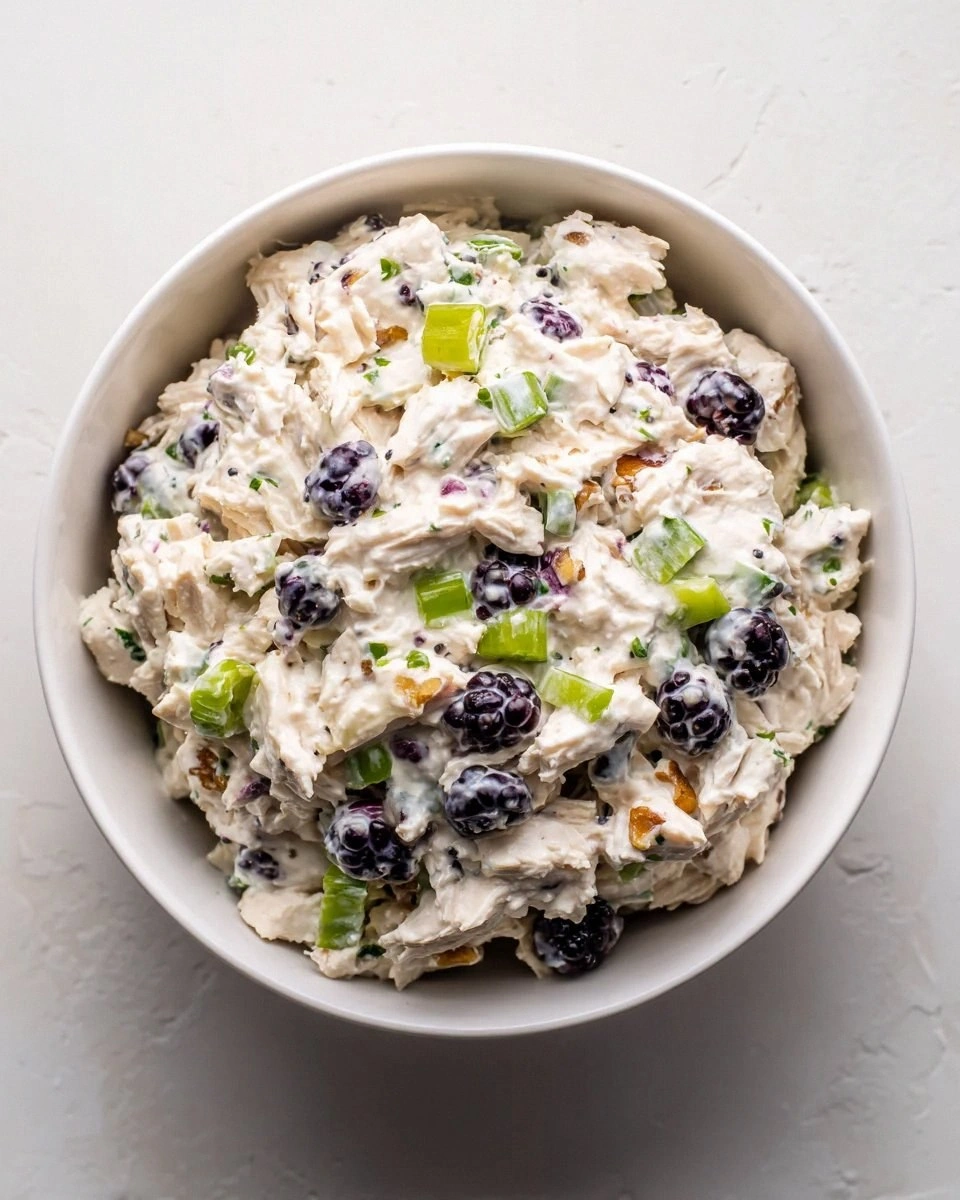
Shredded chicken provides the perfect bite—tender, yet sturdy enough to hold the sauce without falling apart. I recommend using rotisserie chicken because it’s already seasoned and moist, saving you time and effort. If you prefer a leaner option, poach chicken breasts and shred them once cooled.
Shredded cheese (cheddar or a blend of Monterey Jack and mozzarella) creates those glorious stretch‑and‑pull strings that make every bite Instagram‑worthy. Avoid pre‑shredded cheese that contains anti‑caking agents; they’ll melt into a rubbery mess. Freshly grated cheese gives you that melt‑in‑your‑mouth experience.
The Unexpected Star
Butter, garlic powder, and Italian seasoning combine to form a quick glaze that you brush on the buns before baking. This step is the reason the tops get that golden‑brown, slightly crisp finish that most recipes miss. The garlic powder appears twice because we use it both in the sauce and in the glaze, ensuring a layered flavor profile.
Paprika adds a subtle smoky depth and a pretty reddish hue that makes the sliders look as good as they taste. If you love extra heat, sprinkle a pinch of cayenne into the sauce mixture.
The Final Flourish
Slider buns are the unsung heroes—they’re small enough to be party‑perfect but sturdy enough to hold the juicy filling without falling apart. Look for buns that are slightly sweet; they balance the heat nicely. If you can’t find 9‑pack buns, two regular hamburger buns sliced into thirds work just as well.
A pinch of salt and a dash of black pepper finish the seasoning, enhancing all the flavors without stealing the spotlight. Remember, seasoning is the difference between “good” and “legendary.”
Everything's prepped? Good. Let’s get into the real action…

The Method — Step by Step
-
Preheat your oven to 375°F (190°C). While the oven warms up, line a baking sheet with parchment paper; this prevents the buns from sticking and makes cleanup a breeze. I like to set a timer for 10 minutes so I don’t forget the oven—trust me, you don’t want a burnt bun ruining the party vibe.
Kitchen Hack: Place the buns cut side up on the sheet; this ensures the glaze hits the surface that will become the crunchy crown. -
In a large bowl, combine the shredded chicken, Frank’s Buffalo sauce, ranch dressing, ½ teaspoon garlic powder, paprika, salt, and black pepper. Toss until every strand of chicken is uniformly coated—think of it as giving each piece a tiny, spicy coat of armor. The mixture should look glossy and slightly thick; if it seems too runny, add a splash more sauce.
-
Melt the butter in a small saucepan over medium heat, then stir in the remaining ½ teaspoon garlic powder and Italian seasoning. Let it sizzle for about 30 seconds until you smell that buttery, aromatic perfume—That sizzle when it hits the pan? Absolute perfection.
Watch Out: Don’t let the butter brown too much; burnt butter will give the buns a bitter aftertaste. -
Brush the butter‑garlic glaze generously onto the cut side of each slider bun. You’ll notice the buns start to shine instantly—this is the first layer of flavor that will later turn into that coveted crunchy top.
-
Spoon a heaping tablespoon of the buffalo chicken mixture onto each glazed bun, spreading it out just enough to cover the surface but not overflow. The goal is a balanced bite: every mouthful should have sauce, chicken, and cheese in perfect proportion. If you’re feeling daring, add a pinch more sauce for extra heat.
Kitchen Hack: Use a small ice‑cream scoop for uniform portions; this keeps each slider looking professional. -
Sprinkle shredded cheese evenly over the chicken. The cheese should blanket the meat like fresh snow—this visual cue tells you you’ve got enough to melt into those glorious strings.
-
Slide the baking sheet into the preheated oven and bake for 12‑15 minutes, or until the cheese is bubbly and the bun edges turn a deep golden‑brown. Keep an eye on the tops; you want them to be just crisp enough to crack when you bite, not burnt to ash.
-
When the timer dings, remove the sliders and let them rest for 2‑3 minutes. This short rest lets the cheese set slightly, preventing a cheesy mess when you pick them up. Trust me, the anticipation during this pause is part of the fun.
-
Serve the sliders on a platter, optionally drizzling a tiny extra swirl of ranch on top for those who like a cooler finish. Pair with celery sticks, carrot ribbons, or a side of blue‑cheese dip for the full wing‑night experience. And now the fun part—watch your guests devour them faster than you can say “extra hot!”
That's it — you did it. But hold on, I've got a few more tricks that'll take this to another level…
Insider Tricks for Flawless Results
The Temperature Rule Nobody Follows
Always bake at 375°F instead of cranking up to 425°F. A moderate heat allows the cheese to melt fully while the bun’s interior stays soft. If you push the temperature too high, the cheese will scorch before the bun gets its golden crown, resulting in a bitter bite. I once tried 425°F and learned the hard way that burnt cheese ruins the whole experience.
Why Your Nose Knows Best
Your sense of smell is the ultimate timer. When the butter‑garlic glaze hits the buns, you’ll notice a sweet, nutty aroma after about 5 minutes—this is your cue that the crust is forming. When the cheese starts to bubble and you catch a faint caramel scent, the sliders are almost ready. Trust those nose signals more than the clock.
The 5‑Minute Rest That Changes Everything
Allowing the sliders to rest for a brief 5‑minute window after baking lets the juices redistribute and the cheese firm up just enough to hold together. Skipping this rest is the most common mistake I see—people dive in immediately and end up with a sloppy, sauce‑splattered plate. This tiny pause is the difference between “messy” and “perfectly bite‑size.”
Butter‑Glaze Consistency Check
If the butter‑garlic glaze looks too thick, thin it with a teaspoon of water; if too thin, let it simmer a few seconds longer. The right consistency should coat the back of a spoon without dripping off—think of it as a silky sauce that clings just enough to the bun surface.
Seasoning Layering Strategy
Season each component separately: the chicken mixture, the glaze, and the final sprinkle of salt on the assembled sliders. This layered seasoning ensures every bite hits multiple flavor checkpoints, creating a depth that flat, single‑seasoned dishes lack.
Creative Twists and Variations
This recipe is a playground. Here are some of my favorite ways to switch things up:
BBQ Bacon Fusion
Swap half the Buffalo sauce for your favorite smoky BBQ sauce, and fold in crumbled cooked bacon. The result is a sweet‑smoky‑spicy combo that will have BBQ lovers cheering from the sidelines.
Mediterranean Heat
Replace the ranch with a dollop of tzatziki and add a sprinkle of feta cheese. The tangy cucumber‑yogurt sauce balances the heat while the feta adds a salty crumble.
Cheesy Jalapeño Pop
Add finely diced jalapeños to the chicken mixture and use pepper jack cheese instead of cheddar. This gives the sliders an extra kick and a melty, green‑tinged cheese pull.
Vegan Victory
Use shredded jackfruit or soy‑based chicken strips, dairy‑free cheese, and a vegan buffalo sauce. The butter glaze becomes coconut oil mixed with garlic and nutritional yeast for that same rich finish.
Breakfast Slider Remix
Swap the chicken for scrambled eggs, add a slice of crispy hash brown, and drizzle a little maple‑sriracha sauce. It’s a breakfast‑for‑dinner twist that still respects the spicy‑cheesy core.
Storing and Bringing It Back to Life
Fridge Storage
Place cooled sliders in an airtight container, separating layers with parchment paper to prevent sogginess. They’ll keep fresh for up to 3 days. When ready to eat, reheat in a preheated 350°F oven for 8‑10 minutes.
Freezer Friendly
Wrap each assembled slider tightly in foil, then place them in a zip‑top freezer bag. They freeze beautifully for up to 2 months. To reheat, bake directly from frozen at 375°F for 15‑18 minutes, adding a splash of water to the tray to create steam.
Best Reheating Method
For ultimate crispness, use a convection oven or a toaster oven. Add a tiny splash of water to the bottom of the pan—this creates a gentle steam that revives the bun’s interior while the top stays crunchy. Microwaving is okay in a pinch, but you’ll lose that signature snap.