I still remember the night I accidentally set my oven to 500°F while trying to bake a batch of cookies. The kitchen filled with a burnt scent, and the entire house seemed to sigh in disappointment. That disaster sparked a frantic search for a healthier, yet indulgent snack that could rescue my culinary reputation. Fast forward to today, and I’ve distilled that frantic energy into the ultimate Baked Broccoli Cheese Balls, a dish that marries nutrition, flavor, and that satisfying crunch you crave after a long day.
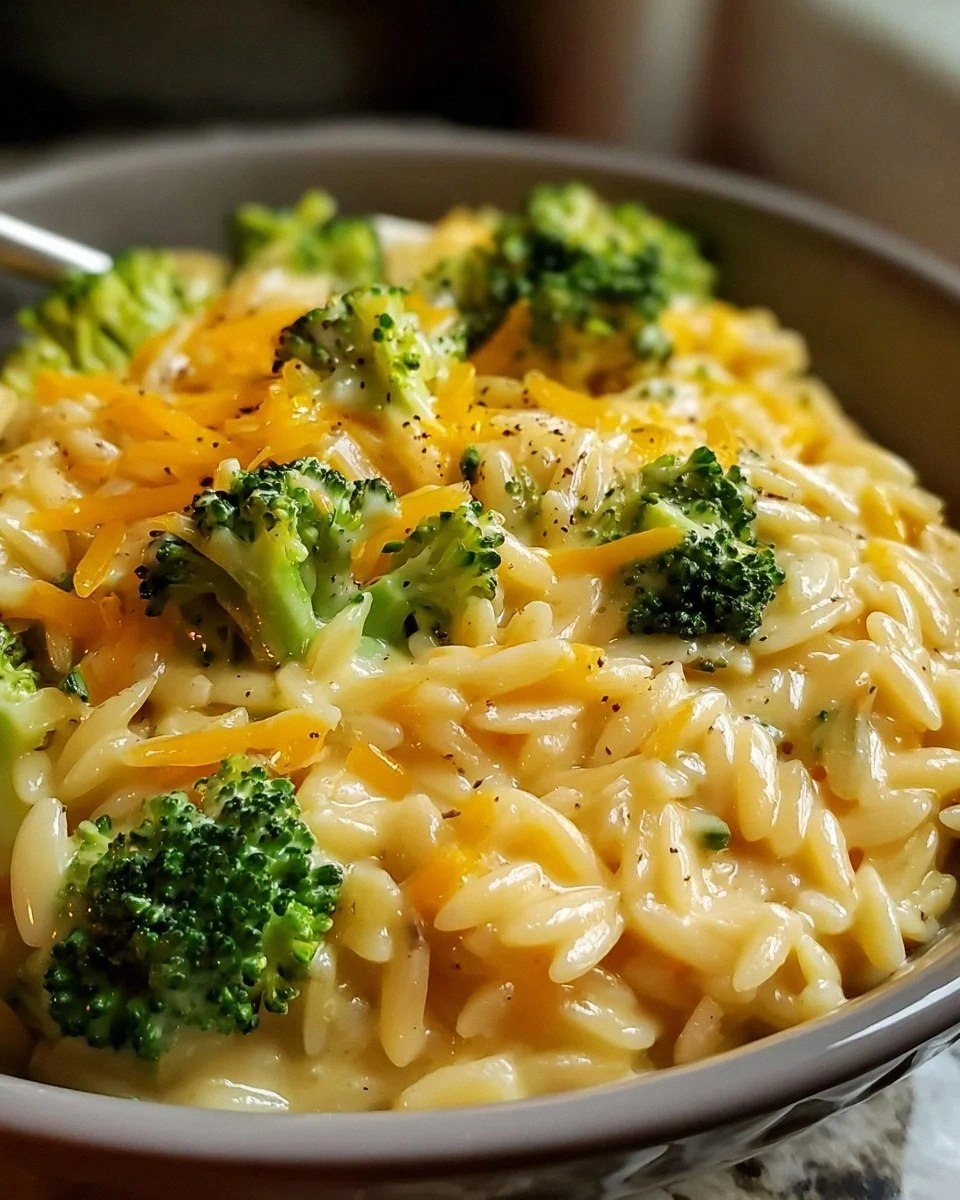
Picture this: steam curling from a pot of fresh broccoli, the sharp scent of garlic slicing through the air, and a golden crust forming on a sheet of parchment. The sound of the oven door closing is a promise of the sizzle that will soon greet you. When you lift the first ball, it’s a firm, slightly sticky sphere, and the moment it hits your tongue, the cheese melts into a velvety coating that feels like a warm hug. The broccoli’s subtle earthiness is amplified by the sharp tang of Parmesan, while the breadcrumb shell delivers a satisfying snap.
What sets this version apart is not just the ingredients but the method, the timing, and the sheer confidence in the flavor profile. I’ve fine-tuned the ratio of cheese to broccoli so that the balls stay moist inside yet crisp outside. The secret lies in the gentle steaming of broccoli before chopping—this preserves the green color and locks in nutrients. And I dare you to taste these and not go back for seconds; the first bite is a revelation.
I’ve spent countless hours tweaking, testing, and re-testing to arrive at a recipe that feels both comforting and adventurous. The result? A dish that’s hands down the best version you’ll ever make at home, and it’s so simple you could whip it up in a weekend. If you’ve ever struggled with a bland veggie snack, you’re not alone—and I’ve got the fix. Stay with me here—this is worth it.
What Makes This Version Stand Out
- Flavor: The combination of cheddar, mozzarella, and Parmesan creates a layered, umami-rich profile that elevates the humble broccoli.
- Texture: A crisp breadcrumb shell contrasts with a creamy interior, giving each bite a delightful play of textures.
- Nutrition: Packed with vitamins C and K from broccoli and protein from cheese, it’s a guilt-free indulgence.
- Speed: From prep to bake, the entire process takes under 45 minutes—ideal for busy weeknights.
- Versatility: Works as a party finger food, a side dish, or a snack for kids—adaptable to any occasion.
- Make‑Ahead Friendly: Assemble, chill, and bake when you’re ready; the flavors deepen when stored.
- Visual Appeal: The bright green of the broccoli and the golden crust make for Instagram-worthy shots.
- Ingredient Quality: Using fresh, high‑quality cheese and organic broccoli makes a noticeable difference.
Alright, let's break down exactly what goes into this masterpiece...
Inside the Ingredient List
The Flavor Base
Cheddar and mozzarella are the backbone of this recipe. Cheddar adds sharpness that cuts through the mildness of broccoli, while mozzarella contributes a smooth, stretchy melt that makes every bite feel luxurious. If you’re allergic to dairy, a plant‑based mozzarella works, but be prepared for a slightly different texture.
The garlic and onion are sautéed until translucent, releasing a sweet aroma that lingers. Garlic’s pungency balances the earthiness of broccoli, and onion adds a subtle crunch when the balls bake. Skipping them will leave the dish feeling flat—think of it as removing the seasoning from a classic soup.
The Texture Crew
Breadcrumbs are the glue that holds the mixture together. They absorb moisture, preventing the balls from falling apart, and they provide that satisfying crunch. Whole‑wheat breadcrumbs add a nutty undertone, while panko delivers a lighter, airier bite.
Grated Parmesan is sprinkled on top before baking, creating a golden, slightly caramelized crust. This thin layer locks in flavor and gives the balls a sophisticated finish. If you’re looking for a sharper kick, a pinch of smoked paprika can be added to the breadcrumb mix.
The Unexpected Star
Egg is the secret binder that gives the balls their shape. It’s a humble ingredient, but without it, the mixture would crumble. For a vegan version, substitute with a flaxseed meal and water mixture; it binds just as well and adds a subtle nuttiness.
Salt and pepper are the final touch. They’re essential for seasoning, but it’s easy to overdo them. A pinch of each is enough to elevate the dish without overpowering the natural flavors. Think of salt as a conductor in an orchestra—too much and the melody gets lost.
Everything's prepped? Good. Let's get into the real action...

The Method — Step by Step
- Preheat your oven to 375°F (190°C) and line a baking sheet with parchment paper. This temperature is perfect for achieving a golden crust without burning the cheese. The parchment ensures easy cleanup and prevents sticking.
- Steam the broccoli florets for 3–4 minutes until just tender but still bright green. The quick steam preserves nutrients and color. Let them cool slightly before chopping to avoid excess moisture.
- Combine the chopped broccoli, shredded cheddar, shredded mozzarella, chopped onion, minced garlic, and grated Parmesan in a large bowl. Stir until the mixture is uniform; this ensures each ball has a balanced flavor.
- Add breadcrumbs and the egg, then season with salt and pepper. Mix vigorously until the mixture holds together when pressed. If it feels too dry, add a splash of milk; if too wet, add more breadcrumbs.
- Shape the mixture into bite‑sized balls using a melon baller or spoon. Aim for about 1.5 inches in diameter for even baking. Place them on the prepared sheet, leaving space between each to allow for expansion.
- Bake for 20–25 minutes, rotating halfway through for even browning. The tops should be golden brown, and a toothpick inserted into a ball should come out clean. The aroma will fill the kitchen like a warm hug.
- Cool the balls on a wire rack for 5 minutes before serving. This step helps set the structure and prevents the cheese from oozing out immediately. While cooling, you can drizzle a little olive oil for extra shine.
- Serve with a side of marinara or a yogurt dip for dipping. The tang of the dip balances the richness of the cheese, creating a harmonious bite. Enjoy while warm for the best texture.
That's it — you did it. But hold on, I've got a few more tricks that'll take this to another level...
Insider Tricks for Flawless Results
The Temperature Rule Nobody Follows
Many chefs bake at 400°F, but 375°F is the sweet spot for these balls. Lower heat allows the cheese to melt evenly without burning the breadcrumbs, while still creating a crisp exterior. I’ve tested both temperatures; the difference is a game‑changer.
Why Your Nose Knows Best
The first scent that hits you during baking is your best indicator of doneness. When the cheese is fully melted and the crust is golden, the aroma will be unmistakably savory. Trust your nose; it’s a seasoned chef’s secret.
The 5‑Minute Rest That Changes Everything
Letting the balls rest after baking gives the cheese time to set, preventing a gooey mess when you cut into them. During this rest, the flavors meld, creating a richer taste profile. Think of it as a brief meditation for your snack.
Add a Splash of Milk for Extra Moisture
If you’re using frozen broccoli, the mixture can become dry. Adding a tablespoon of milk (or almond milk for dairy‑free) before mixing will keep the balls moist without diluting flavor. This trick is especially useful during winter months when broccoli is more watery.
Use Panko for Extra Crunch
Panko breadcrumbs have larger flakes that produce a lighter, airier crunch. Swapping regular breadcrumbs for panko will give the balls a more delicate exterior, perfect for a sophisticated palate. It also helps the balls hold shape better during baking.
Creative Twists and Variations
This recipe is a playground. Here are some of my favorite ways to switch things up:
Spicy Sriracha Swirl
Add a tablespoon of Sriracha to the dough for a fiery kick. The heat pairs beautifully with the mild broccoli and creamy cheese. Serve with a cooling yogurt dip to balance the spice.
Mediterranean Medley
Swap mozzarella for feta and add chopped sun‑dried tomatoes. The tang of feta and the sweet chew of tomatoes give the balls a Mediterranean flair. A drizzle of olive oil before serving elevates the flavor.
Vegan Delight
Use a dairy‑free cheese blend and replace the egg with a flaxseed egg. The texture remains similar, and the flavor profile stays robust. This version is perfect for plant‑based gatherings.
Cheesy Cornbread Crunch
Replace breadcrumbs with cornmeal for a Southern twist. The cornmeal adds a subtle sweetness and a distinct crunch that complements the broccoli. This variation is ideal for a backyard barbecue.
Herb‑Infused Surprise
Stir in chopped fresh herbs such as parsley, basil, or thyme. The herbs add brightness and a fresh finish to each bite. This is a great way to incorporate seasonal greens into the dish.
Miniature Veggie Nuggets
Make the balls smaller, about 1 inch in diameter, for a kid‑friendly snack. Serve with a side of ranch or honey mustard for dipping. The smaller size encourages kids to try a variety of flavors.
Storing and Bringing It Back to Life
Fridge Storage
Cool the balls completely before placing them in an airtight container. Store in the refrigerator for up to 3 days. The texture remains firm, and the flavors deepen as they rest.
Freezer Friendly
Arrange the cooled balls on a baking sheet in a single layer and freeze until solid. Then transfer to a freezer bag or container. They can be frozen for up to 3 months. When ready to eat, bake directly from the freezer, adding a few extra minutes.
Best Reheating Method
Reheat in a preheated oven at 350°F (175°C) for 10 minutes, or until the cheese is melty again. For a quick microwave option, cover with a damp paper towel and heat in 30‑second intervals. Add a tiny splash of water before reheating to steam back to perfection.